3dsmax - Lights
- Systems Next Limit (Unlicensed)
- Next Limit
- Anonymous
The plug-in offers several ways of illuminating your scene:
- Environment lights which include Physical Sky, Constant Dome and Image Based Lighting. You can find the settings regarding environment lights in Render Setup > Renderer tab, in Environment Settings section and Image Based Environment sections.
- You can also illuminate the scene by assigning emitting materials to the objects. This is done by adding an emitter component to any material. You can find more information in the section Lighting with Emitters.
- In order to make things easier for our users, we also created what we call MxLight object, which allows creating Maxwell lights in a similar way as you would do in 3dsmax with conventional spots.
MxLight object
The MxLight object generates the required geometry and material to produce an emitting object and supports the same emitter types as the emitting component of the material: Area, IES and Spot
You can create the MxLight object from the Create → Lights → Maxwell section.
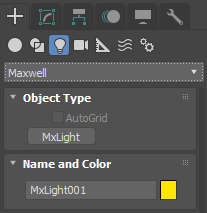
Or using the "Create Maxwell Light" button from the toolbar:

By default, the MxLight is generated with a target an is created by dragging from the emitting object to the target. However, if you disable target checkbox before creating it, you will be able to create the area type by dragging from one corner of the rectangle to the other and in the case of IES or Spot, just by clicking once in the viewport.

Creation method with and without a target
All the types have these common options:
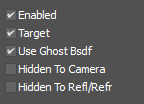
- Enable: will allow us to completely turn the light off or on.
- Target the option will enable or disable the target. If you enable the target, it will be created 1.5m away from the emitting object.
- Use Ghost Bsdf: this option avoids the emitting object from blocking light rays from other lights so, if you place it at a window opening it will also let the environment light in (the emitting object won't cast shadows). Also, if you are using multilight and turn this light's intensity down to zero, the emitting object will turn invisible instead of black.*
- Hidden To Camera: this option will make the emitting object invisible to the camera, but it will still cast light. If you combine this option with "Use Ghost Bsdf" you will get an invisible object that will still illuminate the scene.
- Hidden To Refl/Refr: with the two previous options, you will get an almost invisible object, but it will still be visible in the reflections of other objects or through the refraction of transparent ones. This option will make the MxLight object also invisible in the reflections and refractions of other objects. If you turn the three last options on, you will get a completely invisible object that will still illuminate the scene.
Demonstration of how using a Ghost BSDF affects MxLight object's shadow and visibility
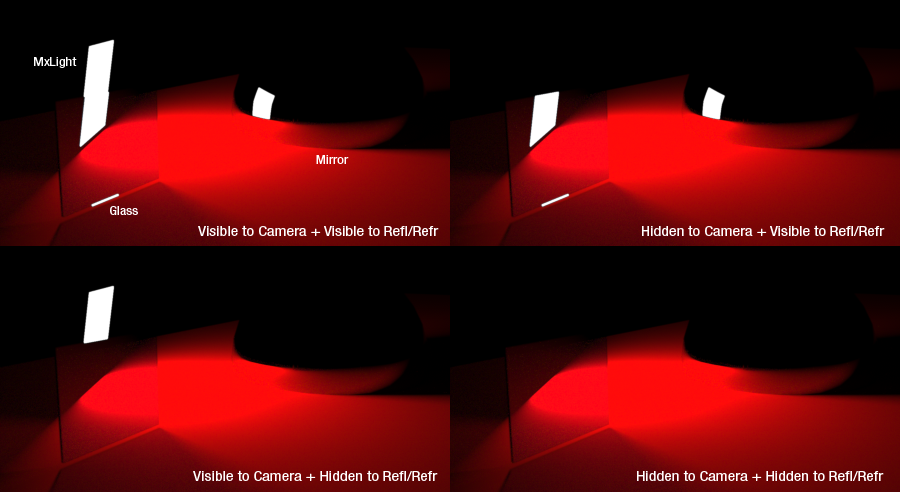
Examples of how the Hidden to Camera and Hidden to Refl/Refr affect the look of the MxLight
The so-called "Ghost BSDF" can also be created in a normal material. It's a normal BSDF with Transmittance set fully white (255,255,255) and Nd = 1. It renders as air and the rays don't refract when traveling through it, so it's very fast. Click on the thumbnail to see an example: ![]()
Light types
The different types will show different gizmos in the viewport:
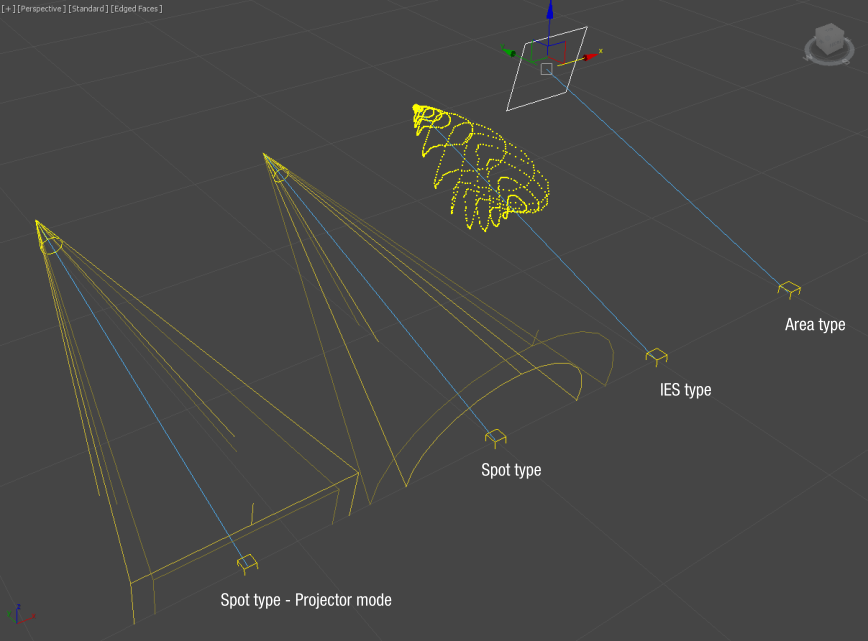
Area Type
- The Area type will generate an emitting square of 50x50cm with a target by default. This will only emit light from one side in the direction of the target. The emitting geometry can be converted to a sphere, in which case the target is disabled. Depending on the type of Emission, the options change. It can be by Color, by Temperature or by using an image.
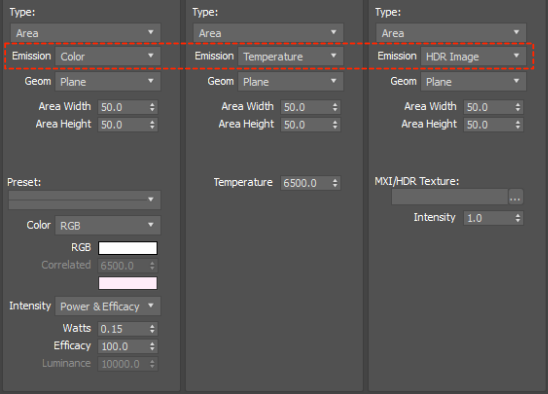
Different Emission modes for Area type
- Color emission allows choosing a particular uniform color of emission and the intensity in specific units. When you choose Power and Efficacy, Lumens or Candelas the intensity will be distributed uniformly over the surface of the emitting object (watch out, as a 100W emitter will barely produce any light if assigned to a 10x10m plane, but will look very bright if applied to a 1x1cm plane. The intensity when you use Luxes (lm/m2) and Luminance (cd/m2) on the other hand, will vary depending on the size of the object. The look of a 10x10m plane will be very similar to a 1x1cm one, but a smaller one will actually emit less light than the bigger one.
- Temperature emission specifies both the intensity and color based on the color temperature value.
- HDR Image emission allows choosing an image to emit light (a TV screen could be achieved with this). Although it is strongly advised to use HDR or MXI files, you can also use other low dynamic range images as jpg, png and so on. As units cannot be specified for this, you can change its intensity with a multiplier.
IES Type
- The IES type generates an invisible ball which is the origin of emission and allows to assign an .ies or .ldt file to it. These files are usually provided by the lamps or spots manufacturers and represent the light distribution generated by the whole lamp. IES type is particularly useful to represent exactly the look of a particular lamp in the market without having to model the whole lamp. Maxwell includes a small collection of these type of files in its installation folder for you to test. In its panel, you will find a multiplier for the intensity and an option to show the lobe (a point cloud representation of the "shape" of the light distribution) in the viewport. It also allows setting the color of the light.
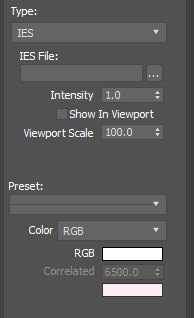
IES type options
Spot Type
- The Spot type simulates a standard spotlight. It generates a cone with an emitting polygon inside (a small triangle); this geometry is always hidden to camera at render time, although it's visible in reflections and refractions unless you activate the option to hide it. It allows setting the cone angle (the highlight area) and the fall-off angle (measured from the cone angle), as well as the type of fall-off (linear, quadratic,...).
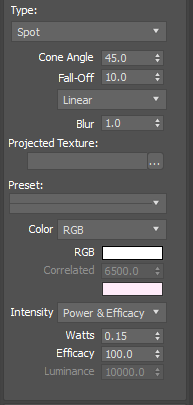
Spot type options
- Blur feature allows modifying the hardness of the shadows. As you increase its value, the size of the emitting polygon increases, producing softer shadows.

- Projected texture box allows loading an image. In this case, the gizmo of the MxLight will change into a pyramid resembling the proportions of the loaded image and the light will work as a cinema projector. You can project any image format, both low dynamic range images (like jpg, tga or png), high dynamic range images (like hdr, exr or tiff32) or even procedural textures. In this case, the falloff angle grows to the inside of the main cone creating a vignetting effect and darkening the corners of the image.
You can find more information about how Spots work in Maxwell on this page: Spot emitters
Select and Manipulate Mode
All the types allow for some extra controls when you activate "Select and Manipulate" button in 3dsmax.

Depending on the gizmo you can resize, rotate, change the spot angles or modify the intensity of the light. For example, in the Area type, you can resize the plane by dragging from its borders; in the case of the Spot type, you can change the cone or fall-off angles by dragging from the base of the cones.
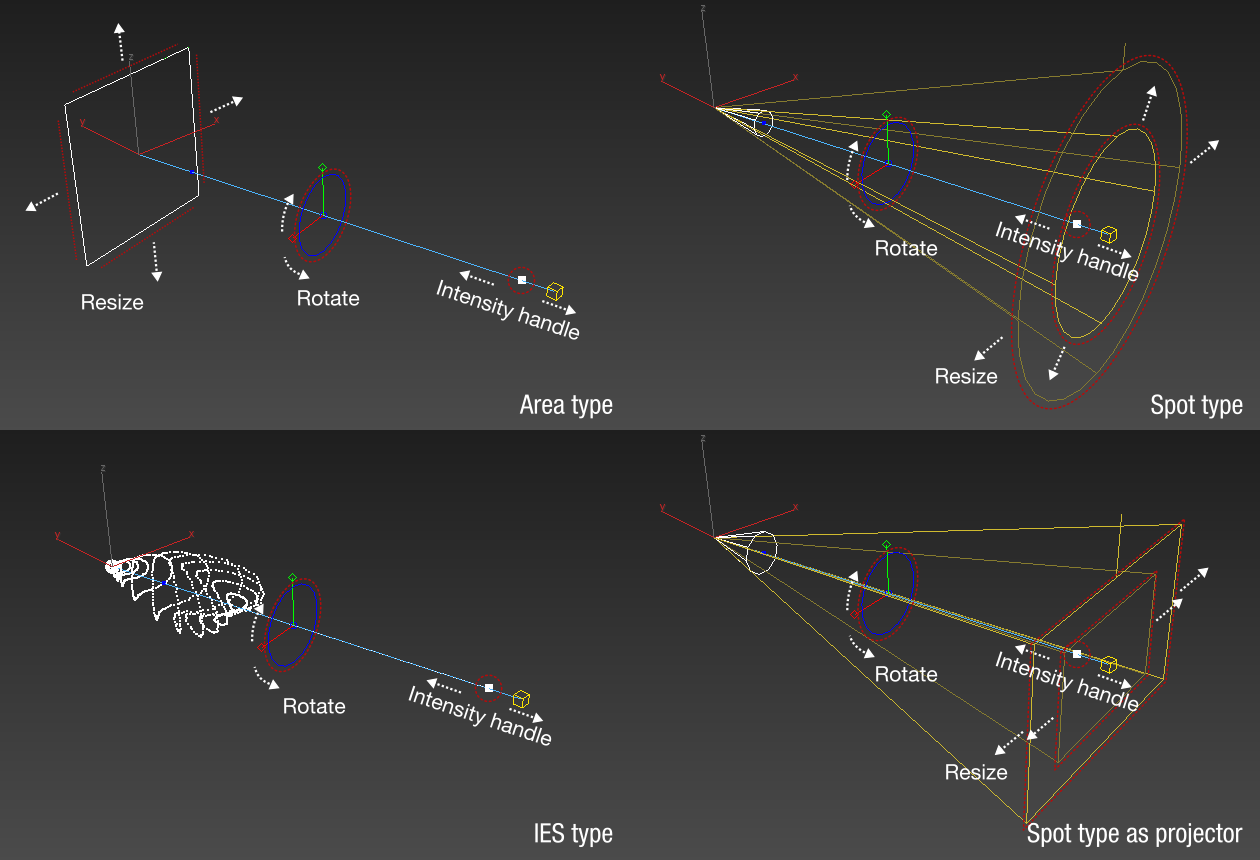
Different options in Select and Manipulate mode
Intensity handle
The intensity handle allows modifying the intensity of the light just by dragging the small box along the light's axis. The small blue dot represents 0 intensity; by default, the manipulator will show 1m away from the blue dot; this represents 10000 lumens. The light changes quadratically to make it easier to select either low or high intensities.
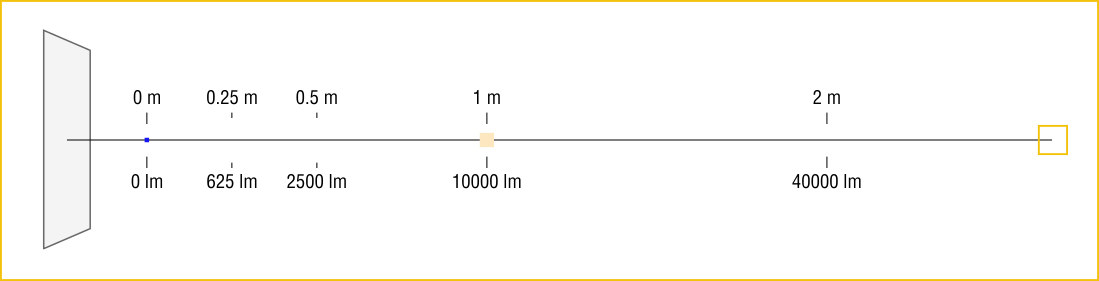
This graphic shows how the light intensity grows quadratically with the distance
Additionally, the color of the intensity handle changes with the color of the light in order to give an idea of how the light will look like.
Maxwell Light Panel
Maxwell Light Panel provides a compact list of all the lights that affect Maxwell with the exception of emitters included in referenced scenes or referenced materials. So it will list first the environment lights (Environment), then the lights based on emitters (Material Lights) and then all the MxLights (Maxwell Lights)
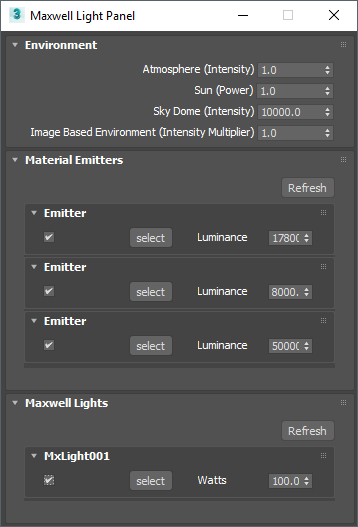
It allows adjusting the light intensities by using the spinners, selecting the material or MxLight and disabling the lights.