Physical Sky
- Systems Next Limit (Unlicensed)
- Next Limit
- Anonymous
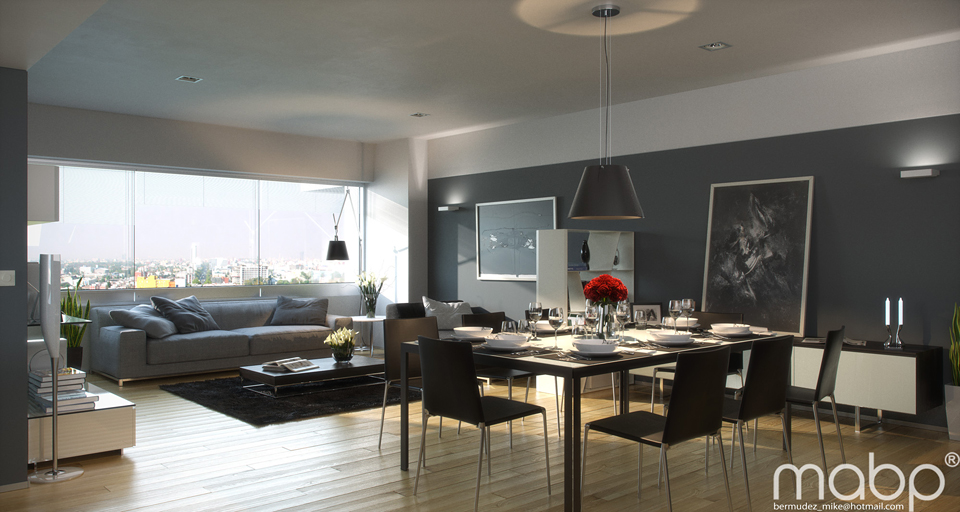
Courtesy of Miguel Angel Bermudez
Environment using Sky type in Physical Sky mode + Sun.
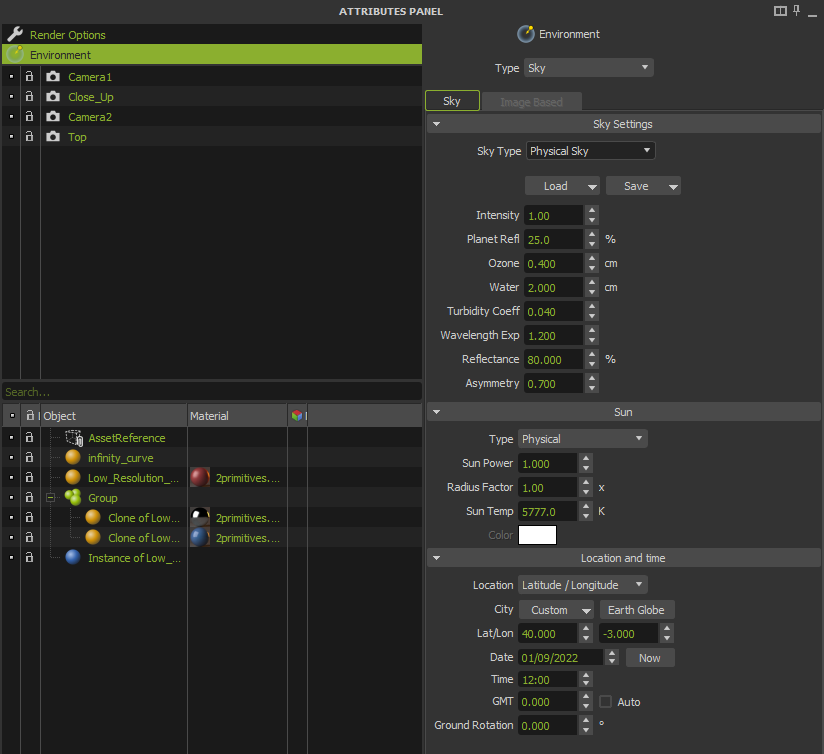
The Physical Sky system in Maxwell Render uses a novel approach, offering a wide range of real-life and physically correct parameters to control the look of the sky and the subsequent lighting in the scene. Results range from common Earth values to exaggerated fantasy skies. Users can create pre-sets of sky settings to quickly load a new sky, or share their pre-sets with other users. It’s also possible to save the current sky as an HDR map.
You will be able to control the atmospheric conditions (atmosphere composition), the Sun behavior, size and color, and your position on Earth (location and time).
Loading/Saving presets
The environment you create can be saved to disk and loaded into other scenes:
Load
- From Disk: Allows you to choose a location to load a .sky pre-sets file.
- From Google Earth File: Allows you to choose a location by loading a Google Eath location file in .kml or .kmz formats.
- Preset: The dropdown will list all the saved pre-sets found in the Maxwell/ skies folder.
Save
- As Preset: Saves a .sky preset file in the Maxwell/ skies folder.
- As HDR: First specify a location for the HDR file, then a resolution. The default format is a longitudinal HDR map (2:1 width to height ratio).
Atmospheric Conditions
Gives you full control over the atmosphere composition, in terms of what affects the light that reaches the surface. This will allow you to recreate anything from a very dense, martian atmosphere to a clean, bright, high mountain ambient.
The default values are the average values on Earth.
Intensity
A multiplier to control the sky contribution to the scene illumination. Useful for creating dramatic effects.
Planet Reflectance
Controls the percentage of light reflected from the planet surface back into the atmosphere. Changing this value will brighten/ darken the overall sky and scene illumination with lower values giving a darker result. Common values are 26-32%. This parameter is similar to the common term “Planet Albedo”, which refers to light reflected from the planet surface plus the light reflected from cloud coverage. Albedo is the ratio of light reflected by an object to the total amount of light it receives. The albedo of an object can range from 0 (0% light reflected back) to 1 (100% light reflected back). The average albedo for the Earth is 0.3, which means on average the Earth reflects 30% of the light it receives back into the atmosphere. The albedo can vary greatly. Fresh snow has an albedo of about 0.8; forested areas have an albedo of 0.05-0.10, etc. Regional albedo values can be found online.
Ozone
The amount of ozone gas in the atmosphere. The default value of 0.4 centimeters means that if you gathered all the ozone in a vertical column stretching through the entire atmosphere, you would get a stack of ozone of 0.4cm high. Raising this value will result in the sky and scene illumination having a more blue tone; lowering it will produce a more yellow tone.
Water
The amount of water vapor in the atmosphere. It is measured in centimeters, in the same way as ozone. This setting may not have much influence on the look of the sky at midday, but will have a clearer effect at sunrise and sunset. In those situations, raising the water value will make the sky look heavier and less saturated, with a red/ orange tone at the horizon, while the rest of the sky will turn a darker blue.
Aerosols
The physical sky model in Maxwell Render adds parameters for aerosols: small particles found in the atmosphere. Light interacts with these particles as it travels through the atmosphere. They absorb and scatter light, which has a big impact on the coloration of the sky and scene illumination. The last four parameters control various aspects of the aerosols found in the atmosphere.
Turbidity Coefficient
Defines the concentration and amount of particles in the atmosphere. A value of 0 creates a perfectly clear sky (in which case the next three parameters won’t have any effect). 0.01 is a good value for low turbidity, e.g. a sky with very few aerosols in it so that it will appear almost clear. 0.04 is a good medium value and 0.1 is a high value. Raising the amount of particles in the atmosphere will usually result in a darker sky and darker scene illumination, but the effect depends also on the Scattering Asymmetry parameter (see below). In bright daylight situations and with a positive Scattering Asymmetry, raising the Turbidity Coefficient will at first desaturate and brighten the sky. Raising the parameter further will start to darken the sky. With negative asymmetry, the sky will begin to desaturate and darken. The following images show this effect:
Raising the Turbidity Coefficient in sunset situations will darken the sky. Remember that you can also raise the ISO of the camera in these cases, which can reveal an interesting sky.

Left: Default settings (0.04) Center: Turbidity 0.65, Scatt Asymmetry 0.7 Right: Turbidity 0.65, Scatt Asymmetry -0,7
Note: Very high Turbidity Coefficient values such as 0.5 are also possible for very dense aerosol atmospheres, for example after a volcano eruption.
Wavelength Exponent
Defines the average size of the particles in the atmosphere. The particle size influences which wavelengths of light are absorbed and which are scattered. You can greatly vary the coloration of the sky by changing this parameter, and the effect of the Wavelength Exponent will be more visible the higher you set the Turbidity Coefficient. Having a lower value than the default 1.2 will have a desaturating effect on the sky. Higher values than the default will at first increase the saturation of the sky, until gradually turning towards green and then orange:

Left: Default settings (Wavelenght Exp 1.2) Center: Wavelenght Exp 10 Right: Wavelenght Exp 30
Reflectance
Refers to the albedo of the aerosols, or the rate of energy scattered and absorbed by the aerosols. Higher values will scatter more light from the aerosols which will brighten the sky and scene illumination. Values range from 0 to 1. A value of 1 means that all light that interacts with the aerosols scatters, and none is attenuated.
Asymmetry
This factor controls the anisotropy of the particles - that is, in which direction most of the light will be scattered. Light can be scattered along the same direction as the incoming sunlight (positive values), or back towards the direction of the sun (negative values). A value of 0 means that the light is scattered equally in all directions (isotropic value). Positive values will produce a halo effect around the sun, brightening the area around it. Negative Scattering Asymmetry values will have an overall darkening effect on the sky. Avoid setting a higher negative or positive Asymmetry setting than -0.85/ 0.85 as this will result in noisier renders.
Sun
Type
- Disabled: Turns off the Sun's direct contribution. For an overcast sky, simply disable the direct contribution of the sun.
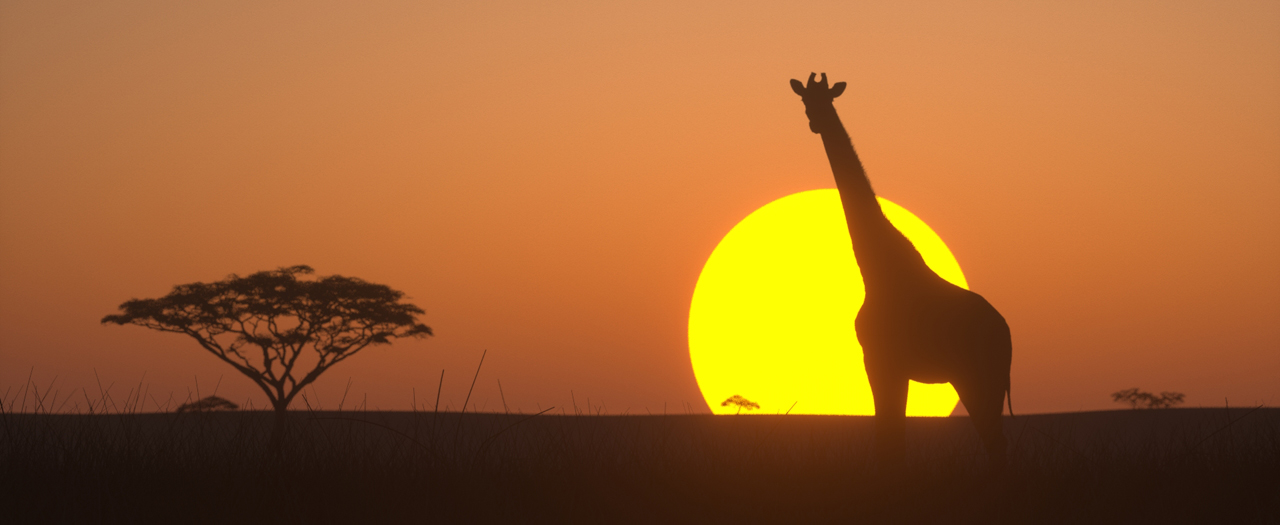
- Physical: The color of the sunlight is derived from the Sun position in the sky by the Physical Sky model. The sunlight will be yellow-white at noon and orange-purple at sunset when near the horizon.
- Custom: The sunlight color can be freely defined using the Color Picker. This custom color and the custom sun Radius allows to define a distant light (with parallel rays thus casting parallel shadows) but with custom control over the light color and blurriness of the shadows (increasing/decreasing the sun Radius).
Sun Power
A multiplier that controls the amount of light emitted from the sun. Higher values than the default 1 will make the sun emit more light; lower values will emit less. A value of 2 means the sun in your scene emits twice as much light as the Earth’s sun.
Radius Factor
A multiplier of the sun's radius. Useful when you need blurrier shadows, or to create larger/smaller visible sun disks in the image.
Sun Temperature (only available in Physical Sky mode)
Temperature of the sun’s spectral radiation. The default value of 5777ºK is the most common value measured outside the Earth’s atmosphere. Lowering this value will give the sky and scene illumination a yellow tint, higher values will give the illumination a blue tint. Although it is possible to change this value for different looks, it is better to leave it as default and instead change the other atmosphere parameters for accurate and predictable results.
When Multilight is enabled, you get an independent slider to control the Sun intensity and the Sky intensity, giving you an extremely powerful control over the key light and fill light contributions, to help you exactly fit your needs.
Obviously, the Sky intensity is always a consequence of the Sun intensity, and they are calculated in a physically correct way during the render, although having them stored separately gives you custom control to get creative results.
Location and Time (Latitude and Longitude mode)
You can specify the orientation of the sun by setting the position on Earth and the time of day and month.
• City: List of cities to quickly choose a location. The list is a text file which you can edit to add or delete locations. It can be found in your Maxwell installation folder (cities.txt).
• Latitude/Longitude: Earth positions to calculate the sky/ sun light direction.
• Date/Now: Set the date. Clicking the “Now” button sets the time and date to your computer’s current time and date.
• Time/GMT: Set the time and the GMT offset.
• Ground Rotation: Allows you to rotate the north direction. This is useful when you want to reposition the sunlight without changing the location or date/ time settings which would change the sky illumination.
• Google Earth™ Data: Allows you to import a KMZ/ KML file to set the location.
Location and Time (Angles mode)
You can specify the orientation of the sun by using spherical angles.
• Zenith: Vertical angle. Similar concept to that of Latitude on Earth positioning.
• Azimuth: Horizontal angle. The angle between the projected vector and a reference vector on the reference plane. Similar concept to that of Longitude on Earth positioning.
Location and Time (Direction)
You can specify the orientation of the sun by specifying a vector.
• X: The X coordinate of the sun direction vector.
• Y: The Y coordinate of the sun direction vector.
• Z: The Z coordinate of the sun direction vector.
Tips for working with the Physical Sky:
- Keep in mind that the atmosphere parameters influence each other. For example, if you raise the Turbidity Coefficient (more particles in the atmosphere), the Wavelength Exponent, Reflectance and Scattering Asymmetry parameters will then have a greater influence on the look of the sky: they are affecting a larger amount of particles.
- To keep the horizon from turning too bright, lower the Planet Reflectance and decrease the Scattering Asymmetry.
- Maxwell Studio and some of the plug-ins can interactively show an accurate OpenGL view of the current sky coloration and brightness. In Studio, press the “K” key to activate/ deactivate the Sky Preview. This OpenGL view also takes into account the cameras’ f-Stop, ISO and Shutter Speed settings.
- The scene illumination and coloring change depending on what sky settings you use. If you raise the ozone level, which makes the sky scatter more blue light, your entire scene will have a bluer illumination.