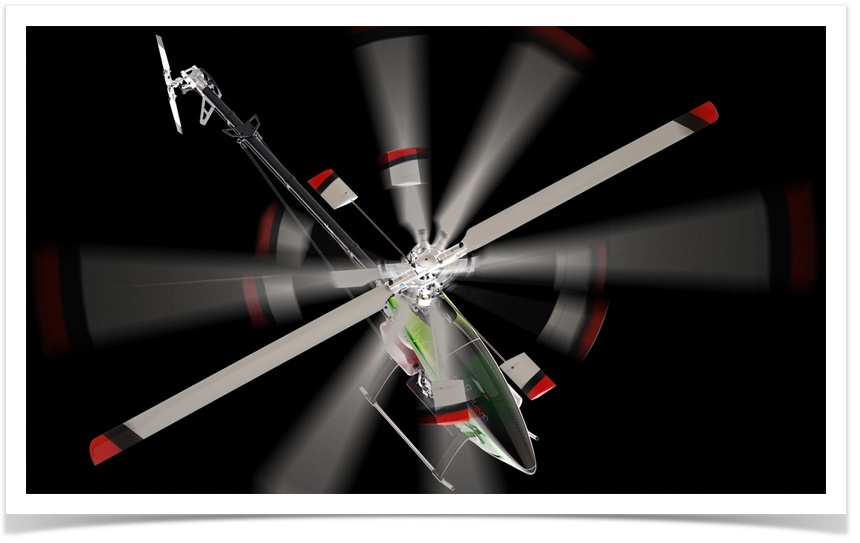
Motion Blur
Courtesy of Paolo Velcich – www.korumdesign.com
Introduction
Motion blur is normally relevant to a film camera - when a frame of the film captures an object that is moving too fast (or the camera is moving too fast), that particular frame is exposed too long to light to '"freeze" the motion of that object and so appears blurry on that frame of film. The amount of motion blur can be controlled in a film camera in two ways:
- by changing the frames per second (fps) of the film so that each frame is exposed for a shorter period of time to the light, thus freezing more and more the action in place. The typical film fps rate is 24fps but can be increased to 60fps or more which will diminish the motion blur and make the movie look more "choppy" - this is usually done for special effects in fast moving action scenes.
- by adapting the angle of the opening in the so called rotary shutter of the film camera. A smaller angle will expose the light for a shorter period of time which will diminish the motion blur. See below for an example of how a rotary shutter works.
The motion blur in Maxwell Render 2.6 has been vastly improved both in terms of speed and capabilities. It is now possible to have virtually unlimited motion blur steps. Effects such as light trails during long exposures are now easy to create and a moving emitter will influence the illumination in the scene along its entire exposure time just as in the real world. A previous limitation where instances could not have motion blur has now also been removed.
Photo camera shutter vs film camera shutter (rotary shutter)
The motion blur settings in Maxwell can be set both for a photo camera and a film camera, so it's important to know how the shutter works in each case to understand the settings.
In a photo camera the shutter simply opens and closes like a curtain to expose the film to light. This speed is determined by the shutter speed parameter in the Maxwell camera. It is denoted as fractions of a second - 1/20 for one 20th of a second, 1/40, 1/250 etc. Setting the camera this way means your shutter will be open for a given period of time, no matter the fps setting of your animation time line.
The shutter on a film camera however is a rotating disc with an opening cut into it, called a rotary shutter, and the angle of this opening determines how long the film is exposed to light as the film rolls by the shutter. Setting the camera this way means the motion blur effect still depends on the fps of your animation because a frame of film can't be exposed longer than the fps setting of the animation, even if the rotary shutter is open during the whole frame. This means an animation running at 60fps will have less of a motion blur effect than one running at the typical 24fps for film.
The angle of the cut in the rotary shutter determines how long the film is exposed to light. In this case the angle is 180º
In the Maxwell camera settings you can pick "Use rotary shutter" and set the shutter angle, by default 180º. Setting the angle smaller means the film will be exposed to light for a shorter time - less motion blur. You can set it all the way to 360º which means effectively there is no shutter blocking the light and the motion blur will be based purely on the frames per second setting of your animation.
If you wish to mimic the typical long exposures you can get with a photo camera, even several seconds long, you should use the shutter speed and set it accordingly - 1/1 for one second, 1/0.5 for 2 seconds, 1/0.25 for 4 seconds etc.
Motion blur steps
This parameter, usually found in the Render Options of the plug-in, controls how many times Maxwell should sample the motion of the animation, given a certain exposure time set by the camera parameters and/or the animation fps. If your exposure time is long and your object doesn't move in a straight line during that time, you should set the steps high enough to smoothly capture the different positions of the object moving. You should also set the steps high enough if you have fast rotating objects, like a propeller, which can rotate several hundred degrees even between two frames. Maxwell will take the number of samples between those two frames (called sub frame samples) that you set in the step setting.
If the motion path you are getting in the render doesn't look smooth, this may be caused by an insufficient number of steps. Increase them until the motion path looks smooth.
The example below shows a sphere moving along a path. The animation lasts 30 frames and the speed is 30fps: 1 second of animation. The shutter of the camera was set to 1/1 (meaning 1 second). The rotary shutter was not used. From left to right the motion blur steps where: 5, 15, 30.
The same scene now using the rotary shutter instead of the shutter speed parameter. Left image has a 180º shutter, right image has a 360º shutter (meaning the shutter is fully open during the exposure of a frame). Even with a fully open rotary shutter, each frame is exposed for only 1/30th of a second (because the animation fps is 30) so the amount of motion blur will be much smaller than in the previous example. In this case a motionblur step of 2 or even 1 is enough.
Motionblur + Deformation
Maxwell Render can calculate two types of motionblur: for the entire object and also for individual moving vertices of the object (deformation motionblur). As deformation motionblur needs more RAM when rendering (depending on the number of vertices the object has), and is only needed if the object actually deforms, you have the choice to activate only normal motion blur or also deformation motion blur.
Motionblur with Emitters
The high precision Motion Blur in Maxwell affects the emitters as well, creating very natural lighting effects on moving objects. Of course, the render doesn't show only the light trail, but the whole scene lighting is being affected by the emitter motion.
If the emitters move during the exposure time, they will produce light trails and the whole scene lighting will be affected by this
Tutorial by MaxwellZone
This video tutorial shows you some tips on how to efficiently create the typical long exposure light trails look.


