3dsmax - Maxwell Layered Material
- Systems Next Limit (Unlicensed)
- Anonymous
Unlike other render engines which provide several shaders with different characteristics, Maxwell has a unified material model. The parameters and components of this model can be manipulated to obtain any desired look. This model is integrated into Max as the Maxwell Layered Material node.
The material parameters are explained in depth in the Maxwell Materials section of the main manual. This section will focus only on the features specific to the Max integration.
Component Tree
A Maxwell material is composed of layers which are blended together like in a 2D painting application. Each layer can contain one or more BSDFs and one emitter component. An optional coating component can be attached to each BSDF. There are also a few global properties which apply to all the layers and an optional displacement component. The material structure is displayed inside MEdit using a custom tree control:
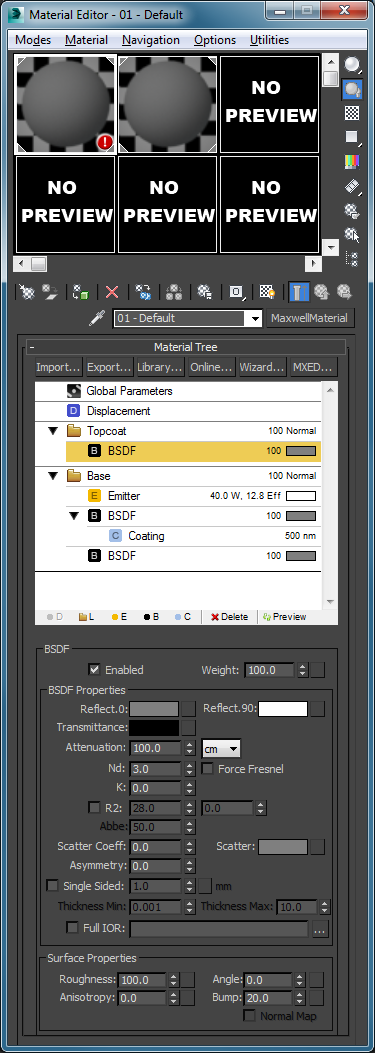
Selecting a component in the tree updates the bottom part of the Material rollup to display the attributes of that component. You can navigate inside the tree using the up, down, home, end, page up and page down keys. Pressing the left arrow key moves the selection to the parent of the current component, or collapses the current component if it's expanded and has children. Pressing the right arrow key expands the selected item if it's collapsed, or goes to thefirstchildoftheselection,ifoneexists.
Components can be removed by pressing the delete key or clicking the delete button at the bottom of the tree. Layers and BSDFscanberenamedbydoubleclickingthemorpressingtheF2 key.
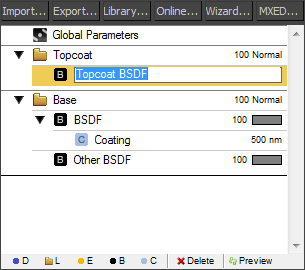
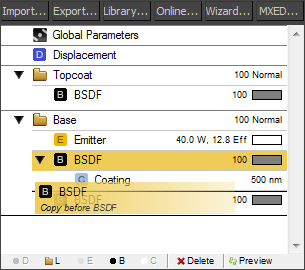
Re-ordering components
You can reorder, reparent, copy and swap components by drag and drop. During the drag operation, a description of the operation which will be performed is displayed at the bottom of the item being dragged. Dropping an item over an item of the same kind will move the first item before or after the second item, depending on the exact mouse position. Dropping an item over a new parent will move the item as the last child of the new parent. Holding down the shift key will make a copy of the item being dragged, instead of moving the original. If the control key is held, you can swap two items by dropping one on top of the other. All the operations are undoable.
Drag and drop to move items
Hold the shift key to copy instead of move

Hold the control key to swap two items
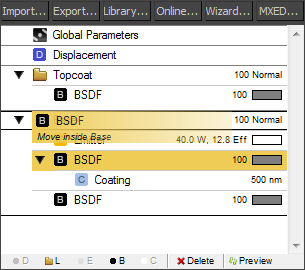
Solo Layers
When a material contains two or more layers you can use the make solo context menu button to deactivate all layers except the one that is currently selected. This allows you to see only that layer during rendering in order to simplify tweaking specific parts of a layer in a complex material. This setting isavailablebyrightclickinganycomponentof the layer and pressing the "Make Solo" button. Pressing "Make Solo" on a layer that is already solo will enable all the layers again. When the material contains only one layer, the Make Solo button has no effect.

Adding components
The first 5 buttons at the bottom of the tree allow you to add new components: D - displacement, L - layer, E - emitter, B - BSDF, C - coating. Some of them will be disabled when the given component cannot be added (because it already exists or cannot be added to the currently selected parent). The "Preview" button refreshes the material swatch when the preview mode is set to "on demand" in the plug-in preferences.
If you graph the Maxwell material in the Slate editor, you will see that each component corresponds to a separate node. However, no data flow occurs between the nodes, the connections are only used to represent the hierarchy. There is no point in adding non-Maxwell nodes between the components and doing so will cause the material to be exported incompletely at render time. It is best to use the material tree control to manipulate the structure instead of setting up connections directly in the Slate editor.
Viewport Display
When the viewport is set to shaded mode, the Maxwell material is displayedusingthecolorofthefirst active emitter or BSDF found in the material. MXI emitters and BSDFs where the reflectance 0 attribute is textured are skipped.
When the material is set on textured mode, the plug-in uses the BSDF reflectance 0 colorsandtexturesand the layer masks and opacity values to compute a blended display texture. The resolution of this texture can be specified in the plug-in settings. You can select a single texture to be displayed in the viewport by clicking the Show In Viewport checkox in the MxBitmap UI.
When using the blended display texture and editing the UV map of an object, the viewport will show incorrect results. This is due to a limitation in the Maya API, as the material doesn't know it has to recompute the display texture. It is better to use an override texture while editingtheUVs,sothatyou can see exactly how the changes affect the mapping. After you are done editing, you can switchbacktoblendedmodeandthe preview texture will be correctly refreshed.
The following screenshots show a material similar to the one used in the Stacking Layers example. The material has 3 layers: a painted ceramic layer at the bottom, a gold layer using a mask over the paint and the yellow symbols on top of everything. The image on the left shows the blended layers in the viewport, while on the right the ceramic paint texture was selected as an override, so it's displayed by itself.

Blended textures

Single texture override
Importing and Exporting Materials
Materials can be imported and exported in the MXM file format by using the corresponding buttons above the material tree. When you export a material, you are offered the option to also copy all the material resources (textures, IES files, IOR files) next to the MXM file.
Library
The Library button opens MXED (Maxwell Renders standalone material editor)inlibrarybrowsingmode, so that you can import materials from the collection which is installed together with Maxwell, or browse to any folder which contains MXM files.

Gallery
The Gallery button allows you to browse Maxwell's online material gallery which contains hundreds of high quality materials made by Maxwell users. When you click the Import button, the corresponding MXM file and all its dependencies are copied to the sourceimages subdirectory of the current Maya project and the material settings are imported.

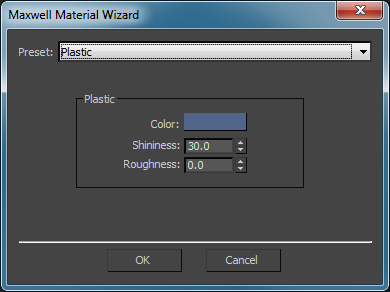
Wizard
The Wizard button allows you to create common material types by providing only a few parameters. These presets are a good way to start learning about creating materials.
Swatches
Material swatches can be updated automatically, whenever a material attribute is changed, or on demand by pressing the Preview button below the material tree. You can select the update mode in the plug-in preferences, along with the preview scene and quality settings. Depending on the hardware configuration, material complexity and number of materials in the scene, updating theswatchescanbecomeatime consuming operation, especially when opening MEdit, which tries to display many materials at once. In that case, switch toon demand updating. The swatch images are saved to disk when saving the scene,soinondemandmode they don't need to be recomputed every time they need to be displayed.