Noise
- Systems Next Limit (Unlicensed)
- Anonymous
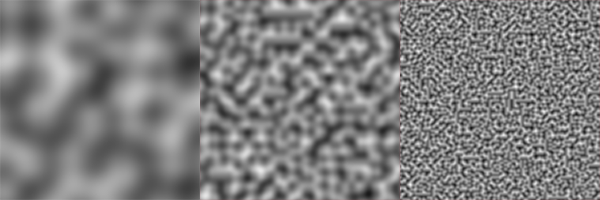
The Noise Procedural creates a pseudo-random noise pattern based on Ken Perlin's implementations. Due to its infinite and seamless nature, it is ideal for replicating organic or dust patterns. Useful as a color texture or in grey-scale as a bump, displacement, weight map or mask texture.

Examples of the Noise procedural in use, both as color texture (left), layers mask texture (middle) and bump (right)
Noise Procedural parameters
Blending factor
Blends a percentage of the current procedural with the result of the procedurals below in the stack.
Coordinates type
Chooses if the procedural will be created in object Texture coordinates or in World coordinates. World coordinates may be more suitable most of the time as this will avoid creating seams which can appear if the objects texture coordinates are used instead.
Background and Noise color
Defines the color used for the background and for the noise spots. Uses black, white or grey tones when the noise is used as a mask texture.
Detail
Create larger or smaller sized noise detail. Please keep in mind that if you want to save the noise procedural to disk as a texture, you must specify a large enough texture size in pixels to accomodate the current detail level you have set. Otherwise, the exported noise texture will show mostly black and white dots.
Detail set to 5,15,50
Octaves
The number of times that the initial noise pattern should be repeated. With each repetition (octave) the noise will be half the size of the previous octave. The effect will look similar to having an initially smaller Detail, but the difference is that the larger initial Detail will still be visible, and the Octave parameter will add smaller noise to the initial larger noise pattern.
To better visualize how the Octave parameter affects the noise pattern, let's look at it through a 2D cross-section: This parameter controls how "persistant" the noise is through each octave. With a high setting, the initial noise pattern quickly disappears, while the frequency of the noise increases: On the other hand, if the Persistance is very low, the noise pattern will dissipate very quickly with each octave: Relationship between Octaves and Persistance From the diagrams above it follows that: If you set the number of Octaves to 1, the Persistance parameter does not matter anymore. If you set the Persistance value to 0 (or extremely low), the Octaves parameter does not matter anymore. In both of these cases, it is only the Detail parameter that will influence the look of the noise.
5 octaves of noise shown individually and then added together to form the final noise. Notice how the final noise retains some of its original shape from the first octave (in this case a medium Persistance was used, see below)
Persistance

Example of using 5 octaves, and a high Persistance such as 0.9 -notice in the result how the initial noise pattern is not really present anymore because of the high frequency/small wavelength noise

Still using 5 octaves, but a small Persistance such as 0.1 - notice how the initial and final noise patterns are largely the same, no matter how many octaves you specify.
Low Clip
Allows you to clip the low values of the resulting noise colors. Maps RGB 256 to a 0-1 range. Lower values than the one specified will be "clipped" to the Background color.
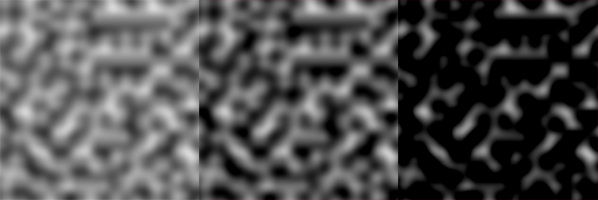
Low clip values of 0, 0.25, 0.5
High Clip
Allows you to clip the high values of the resulting noise colors. Maps RGB 256 to a 0-1 range. Higher values than the one specified will be "clipped" to the Noise color.

High clip values of 1.0, 0.5, 0.25
Seed
Initial value used for the generation of random numbers used by the noise procedural.