/
Masking Objects
Masking Objects
- thomas (Unlicensed)
Owned by thomas (Unlicensed)
Masking objects allow you to shape your fluid volume by cutting out particles. The entire process is similar to Boolean subtraction operations, but requires a certain workflow.
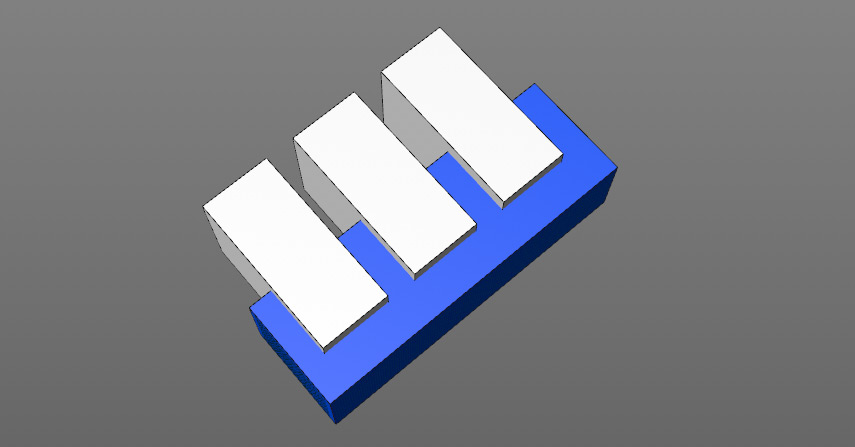
The blue area should be filled with particles, the white areas will cut aways.
To achieve the look from the image below go through a few steps. In the first step, create four cubes, arrange them, and specify the one you want to fill with particles (named "Fill_Object" here).
- Add a "Fill" emitter and drag the "Fill_Object" cube to the emitter's "Body" slot.
- Set the emitter's "Particle Distribution" to "Fill Volume".
- "Fill Solid Region" must be active.

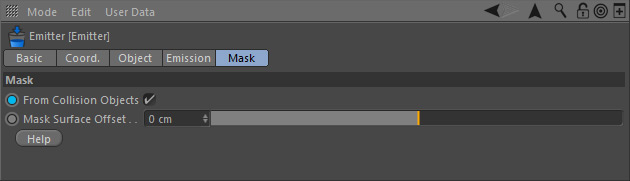
- Enable the emitter's Mask > From Collision Objects option.
Time to adjust the mask objects:
- Add "Collider" and "Volume" tags to the mask objects – the "Collider" tag tells RealFlow | Cinema 4D that there is an interacting object.
- Select the "Volume" tags. If the "Volume Mode" has not been recognited automatically set the option to "Solid Inside".

- Reset the scene (go to the last frame, then back to 0). You will see that the volumes of the three remaining cubes have been used as a mask to clip the particles. This way it is possible to create complex shapes without having to model an appropriate container.
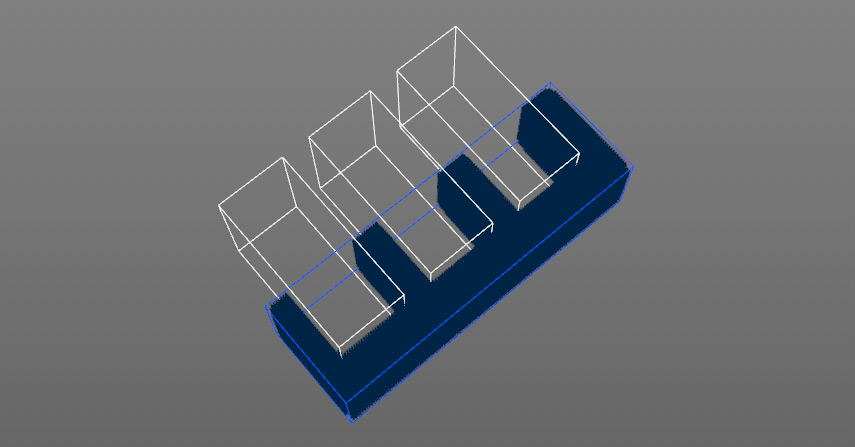
The result is a particle volume with notches.
The best and fastest way to proceed is to create an initial state from the fluid:
- Go to Scene > Cache and specifiy a "Cache Folder (macOS | Windows)", where the intial state will stored.
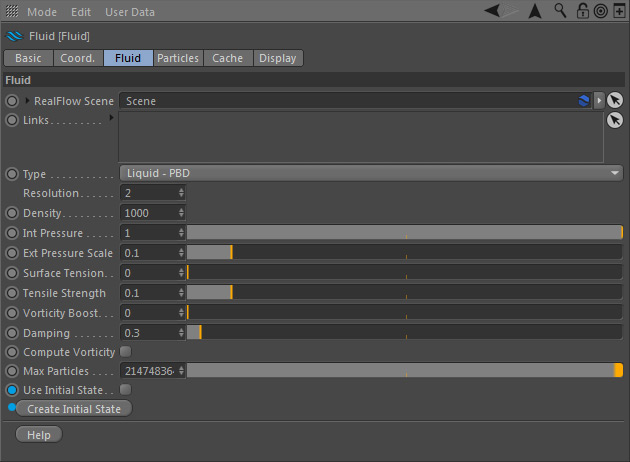
- Go to Fluid > Fluid and click on "Create Initial State", then tick "Use Initial State".
- Under Mask > Mask disable "From Collision Objects".
- Reset again.
Related content
Filling Objects I
Filling Objects I
More like this
Masking Objects
Masking Objects
More like this
SP - Fill Object
SP - Fill Object
More like this
Filling Objects I
Filling Objects I
More like this
Filling Objects
Filling Objects
More like this
SPH - Fill Object
SPH - Fill Object
More like this