Translucent assistant
- Systems Next Limit (Unlicensed)
- Next Limit
- Anonymous
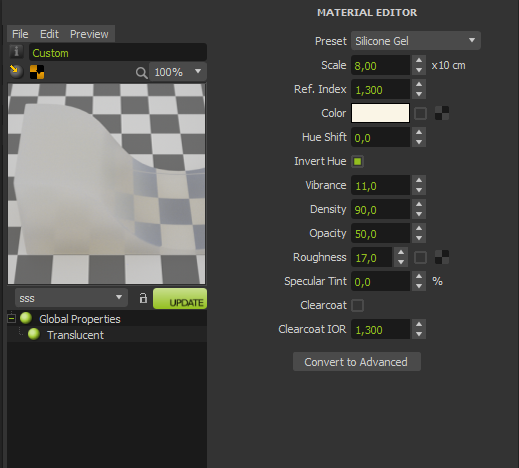
Preset
Several presets are available. You can also add your own presets which will appear in this list.
Scale
This parameter is very useful for quickly adapting the amount of transparency/translucency to the size of the object that the material is applied to. For example you might like the overall look when you use one of the preview scenes, but when you apply it to a very small object in your scene, it looks much too transparent and not solid enough. In this case, simply lower the Scale and the material will start looking more and more solid. On the reverse scale, if you apply it to a large object and it looks too opaque, raise the Scale parameter.
![]()
Scale parameter from left to right: Default of 8, 1, 20.
Refractive Index
The main refractive index of the material. The visual result is that higher values will make the material look more reflective (if the Roughness parameter is low enough to show sharper looking reflections). Common values are between 1.3-1.6. It's recommended not to raise this value above 1.6-1.8 or it will create a much too reflective translucent material which will not look realistic, while also darkening the look of the SSS because more light is simply reflected off the surface, instead of going into the object and scattering inside.
![]()
Refr. Index at 1.2 and 1.7
Color
The main color of the translucent material.
Hue Shift
In certain translucent materials, the main color hue can "shift" as the light scatters inside the object. The result is you see the main Color you have selected but also a slightly different hue which is offset from the main Color. You can choose the amount of offset in degrees from the hue of the main Color, with 120 degrees being the maximum setting. Usually, small hue shifts are the most realistic, for example if you have a red candy material with a hue shift of around 30 will make the red also have hints of yellow in it.
![]()
Here the hue shift was set to 80 degrees for an exaggerated effect, which internally makes the main red color shift towards green. The resulting scattering effect now is red mixed heavily with green.
Invert Hue
Turning this parameter on can be useful for materials that actually show complementary colors in their scattering, such as milk, which looks mostly yellow but also shows tints of blue nearer to the light source. Checking this parameter will cause the tints to be the opposite hue in the color wheel, compared to your chosen Color setting.
Vibrance
This is the actual saturation of the particles inside the volume that scatter the light. Higher values will make the material look much more saturated and vibrant.
 Using a bright red as the main Color, the Vibrance setting was changed: 0, 15, 50
Density
The amount of particles inside the volume that scatter the light. If Density is set to 0 then Sub Surface Scattering is disabled and you will instead get a regular glass material. The density setting can be confused with the Scale parameter which also controls in a way the final "density" of the object, but this parameter allows you to have finer control over the amount of scattering that occurs. For example lets say you wanted to have a "smoky" looking red tinted glass which was colored red in thinner areas and showed little scattering/density (it looks like a red tinted glass), but as the glass gets thicker we start seeing not only the red tint but also the glass starts to get more and more translucent and a little solid looking. It would not be possible to achieve this look with the Scale setting alone:
With Scale adjustments alone
![]()
We get something that looks like red tinted glass in the thin parts but it still looks like there is not enough red tinting there, and also the thicker parts look much too solid. If we raise the scale to make the thick parts look less solid (in this case raising it from the default 8, to 20), we almost completely lose the red tinting in the thinner parts, plus the thick part still looks too solid and not glass like. Both tests used the default setting of Density 90.
With Scale + Density adjustments
![]()
Here instead, we will start by first setting the Density to 0 and adjusting the Scale so that we get our red tinted glass the way we want (a bit of red tint in the thinnest parts). For this particular object, a Scale of 0.8 was used. Next, to just add a hint of density in the thickest parts, we start adding in some Density. In this case a final Density setting of 25 was used. The result is we still get a slight red tinting in the thinnest parts, and a smoky denser look in the thickest parts.
Opacity
Controls the opacity of the particles which scatter the light inside the volume. The visual effect of this is that with higher Opacity the light is not allowed to go too deep into the object and is instead scattered back towards the surface - the translucent material turns solid more quickly. With small settings the light is allowed to go deeper into the object thus creating a deeper more translucent look. Small values are good for materials such as ice, butter, translucent liquids while higher values are good for very opaque looking plastics for example. For a balanced translucent look, the default value of 50 works well.
![]()
Opacity of 10, 25, 50, 90
In the example above, there is also a desaturating effect happening with higher Opacity. This is because in this case, the Vibrance was set very low (2), and so the scattered light is not very saturated. Because more of this scattered low saturation light is visible with higher Opacity (more light is scattered back to the surface), we get a desaturating effect.
Roughness
Controls the surface roughness allowing for more shiny or more dull surfaces.
![]()
Roughness 0 vs 80
Specular Tint
Allows you to tint the highlights to the color of the main Color. This can be useful for getting a certain look but keep in mind that for realistic materials the speculars are almost always white or close to white.
![]()
Tinting: 0, 100. You can see how the highlights look green with the tinting set to 100
ClearCoat
Adds an extra layer of clear coating which can be useful if you want to use a rougher base material that has a clear coating on top.
Clearcoat IOR
Controls the index of refraction of the clearcoat. A higher IOR makes it more reflective, while lower settings make it less reflective.