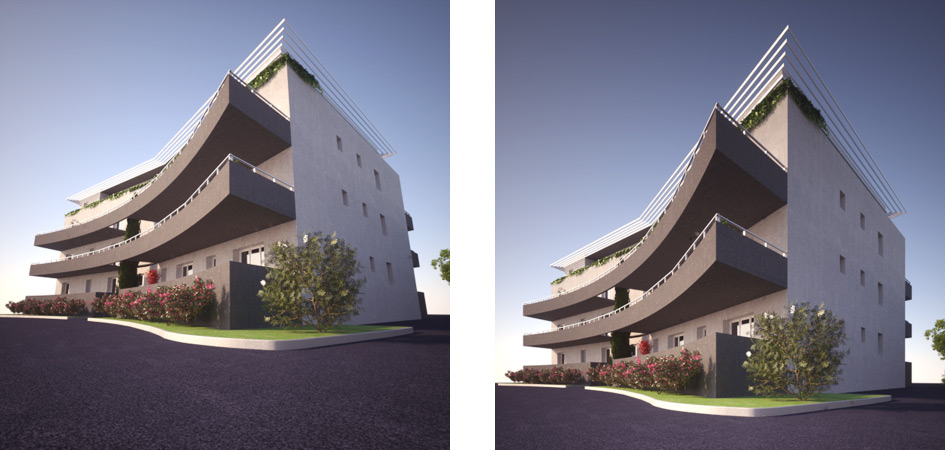
Shift Lens
Shift Lens disabled (left) and enabled (right) to allow capturing the entire building while keeping the camera level, thus creating straight vertical lines
In the case of architectural renders, a three point perspective is not always desired as it makes the building look like it's falling away from the viewer. To create a two point perspective (where the verticals are parallel) you have to keep the camera level to the horizon but this might begin to cut off the top of the building while having too much of the ground in the image. You could move the camera further away from the buidling to capture it all and then crop the image to retain the revelant parts, but this is not always possible as other buildings might get in the way.
To solve this, a so called Shift Lens is used in the real world where the front of the lens can move up/down/left/right independent of the film back. This allows you keep the camera closer to the building, while capturing the entire building. The Shift Lens feature performs exactly this task, and the Offset parameter controls the amount of lens offset.
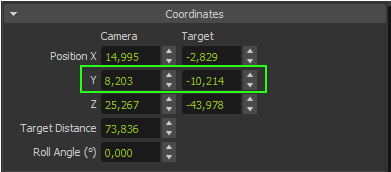
To make a two point perspective render you have to maintain the camera level to the horizon. You do this by making sure that the camera and the camera target are at the same height. In Maxwell Studio and many 3D applications, the Y axis is considered the "up" axis so this parameter needs to be the same for both camera and camera target. In other applications, it could be the Z axis that's considered the up axis.
Camera and camera target at the same height (Y axis)
After you have leveled the camera, you should navigate the camera in the viewport only by panning (Alt+MMB) to avoid rotating it up/down and thus creating a three point perspective again. Once you have the view you want, use the Shift Lens parameters to move the frame up/down/left/right. It acts like percentage of the size of your image, so a 100% shift in the Y axis will offset the image up exactly the height of the image.


