Camera Lenses
- Former user (Deleted)
- luis (Unlicensed)
Maxwell Render V3 provides you with 6 different lens types useful for a range of different scenarios. For example the spherical lens can be used to create environment maps for use in Environment lighting, or to create 360 degree virtual tours.
Thin Lens
This is the default lens, which was the only lens type available prior to V3. It mimicks a standard camera lens with accurate depth of field effects. For details on how to use this lens, please see the Camera page.
Pin Hole lens
This lens is similar to the thin lens in functionality, except it doesn't produce any depth of field (blurring) effects. It may be useful for times when blurring due to a very narrow depth of field is to be avoided.
Ortho lens
This lens renders with a 2 point perspective, sometimes referred to as an "orthographic" projection. It differs from a true perspective view in that all the lines/edges in the view are parallel to their respective axis.
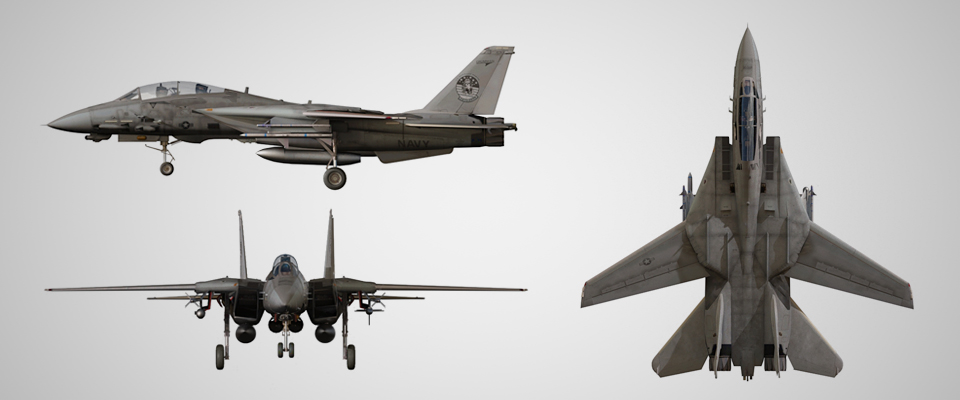
Orthographic views (Side, Front and Top) rendered using an Ortho Lens
Fish Eye lens
This lens is an ultra wide angle lens, capturing a typically 180 degree hemispherical view of the scene while distorting straight lines, otherwise known as a "circular fisheye" lens. It is considered a specialty lens which is often used in architecture to capture a very wide angle view of a space:
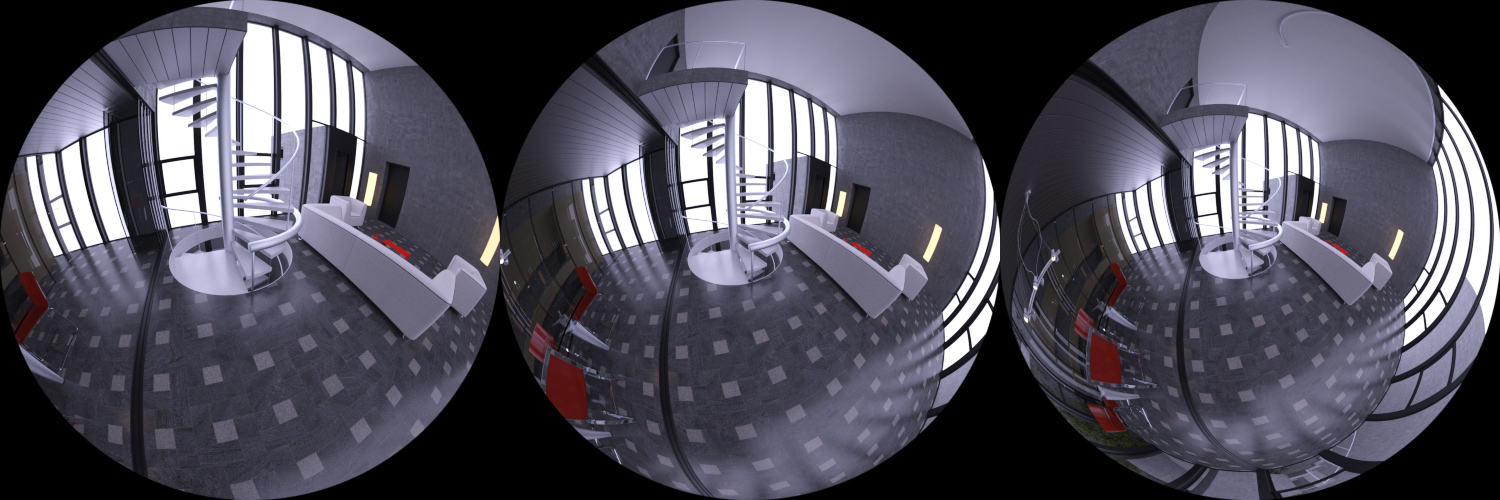
Fisheye lens with FOV settings of 180, 240, 300. Note that as the field of view setting increases, the fisheye lens sees more and more of the scene
The FOV (Field of View) lets you specify the horizontal FOV of the Fisheye lens, letting you capture more or less of the scene. The most typical setting though is 180 degrees, which will let you see a 180 degrees hemispherical view, measured either horizontally or vertically in the resulting image circle.
"Circular" vs "Full-frame" fisheye
In photography you will hear most often these two distinct types of fisheye lenses described. The circular type is what Maxwell will render - this means it projects a certain FOV onto a circle, within the film plane. If the FOV setting is 180 degrees for example, then it projects a hemisphere of the scene onto the film plane.
For a "full frame" fisheye however, the FOV is not measured horizontally or vertically, but instead only diagonally. This means it will cover less of the scene compared to a circular fish eye image. You can also get a "full-frame" type of fisheye image by manually cropping the resulting render, using the ratio of a typical camera sensors size. For example a full frame sensor photo camera has a sensor of 36x24mm, which gives a ratio of 1.5. Make a marquee selection in your image editing application which uses this same ratio, and that touches the limits of the image circle. Crop the render using this marquee selection and the result will be a "full frame" fisheye image:

Selection to "convert" the circular fish eye render into a "full frame" fisheye. In this case a FOV setting of 180 was used
For the fisheye lens to work properly, you must enter a square resolution for your camera, ie. 500x500, 2500x2500 etc.
Spherical lens
This lens creates a 360 degree render of your scene, using an equirectangular projection. This type of projection is commonly used for HDR captures of a real world environment, which are used for Image Based Lighting. So you can use the spherical lens to create an HDR environment of your scene, or to create virtual 360 tours. There are applications that can import an equirectangular image, and construct an interactive web page from that image (ex. PanoPro, 3D Vista).
Because an image using equirectangular projection is always twice as wide as it is tall, you must make sure to enter this ratio in your camera output resolution for the spherical lens to work properly. For example: 1000x500, 2500x1250 etc.
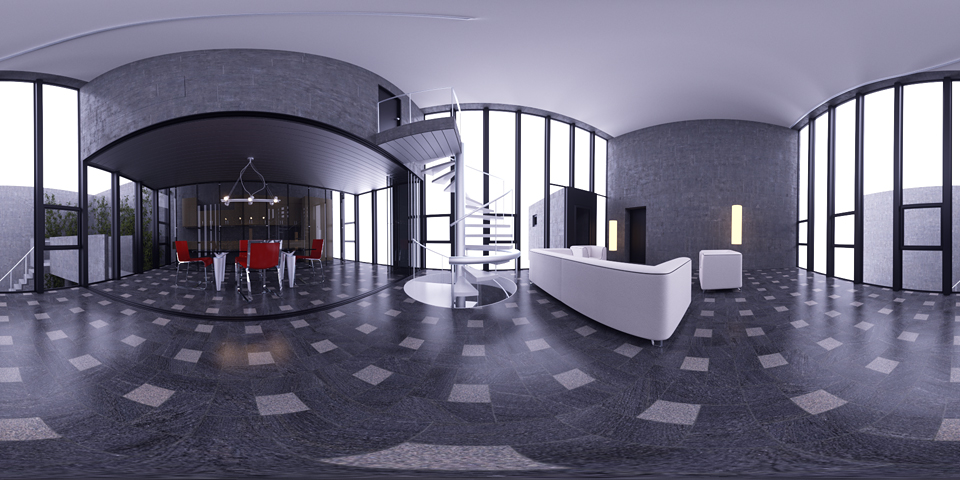
360º view of an interior, rendered using an Spherical Lens. This projection is usable as an environment for other interior renders. Notice the 2:1 aspect ratio
Cylindrical lens
This lens creates a 360 degree render of your scene, using a cylindrical projection, instead of a spherical one. You can choose the angle of view that should be represented in the cylindrical projection.
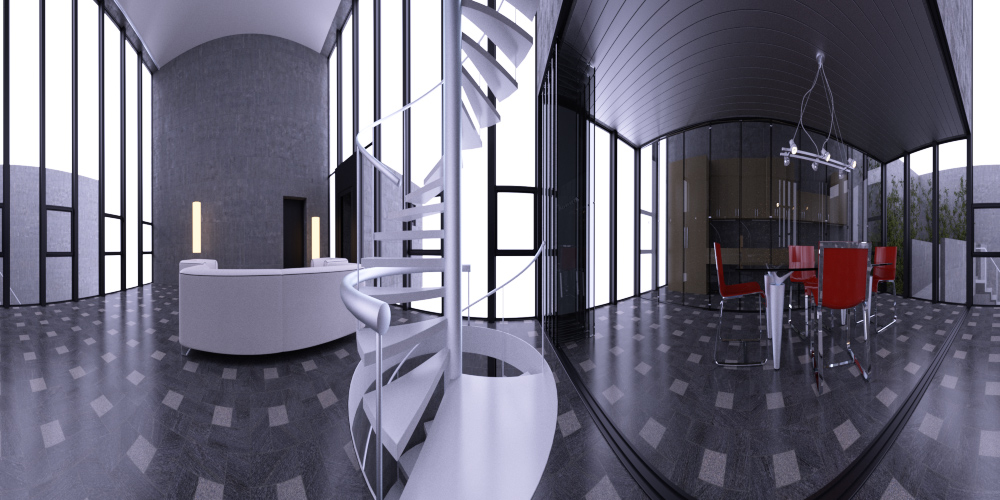
Cylindrical lens with a setting of 180 for the Angle.
For best results, you should generally use a render ratio of at least 2:1 (twice the width compared to the height)
Lat-Long Stereo lens
Suitable for virtual reality (VR) systems such as Oculus, this lens creates a 360 degree render of your scene, using an equirectangular projection while allowing you to generate the needed images for creating the stereo effect: one for the left eye, another for the right eye and the centered one (you can set the intraocular distance). It works like the Spherical lens mentioned above, but with stereo support.
Example loop of left and right images produced with the Lat-Long Stereo lens. (As this is an animated .gif file it may not show the same color quality as the final images from Maxwell).
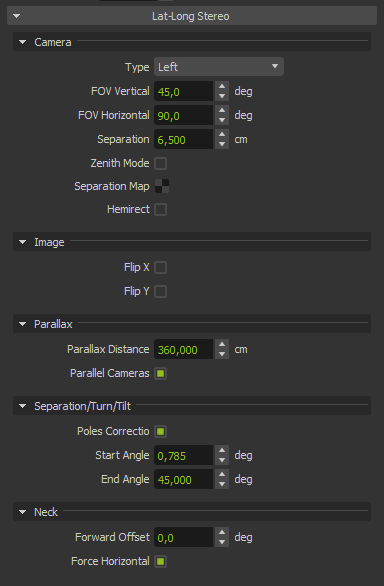
Settings panel for the Lat-Long Stereo lens.
Fish Stereo lens
This lens is similar to the normal Fish Eye lens mentioned above but allowing to generate the left, right and center images for creating the stereo effect.
Example loop of left and right images produced with the Fish Stereo lens with FOV=180º.
(As this is an animated .gif file it may not show the same color quality as the final images from Maxwell).
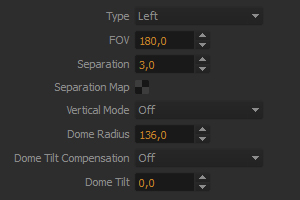
Settings panel for the Fish Stereo lens.