Mesh Channel Vertex Maps
- thomas (Unlicensed)
- Hector Artal (Unlicensed)
RealFlow | Cinema 4D particles are differently coloured according to their velocity, vorticity (has to be activated separately under → Fluid > Fluid > Compute Vorticity), or age values. These values can be transferred to meshes and rendered, adding some extra realism.
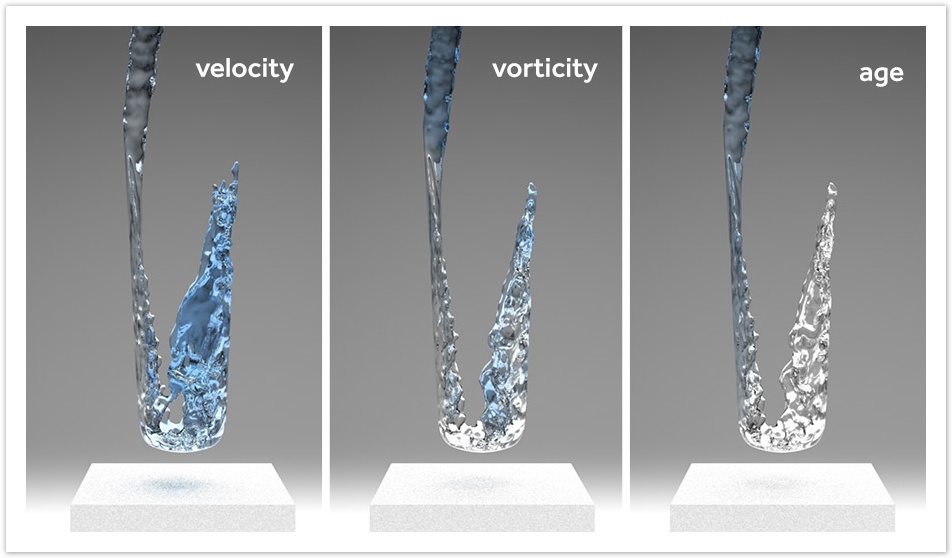
Blue colours indicate low values, brighter tones stand for higher channel values.
Vertex Maps
When you take a look at the "Mesher" object you will recognize several "Vertex Maps" tags representing the fluid's channels: speed, vorticity, age, weights, velocity X|Y|Z

- If you want to use vorticity you have to activate → Fluid > Fluid > Compute Vorticity before the simulation, otherwise the channel will not be available.
- The "Weight" channel is makes only senses if the simulations contains at least two emitters or fluid containers, and requires a slightly different → workflow.
- The "velocity X|Y|Z" vertex maps cannot be adjusted, and they are required for motion blur effects.

The complete selection of channels with the "Smoothing Length Scale" value to blend materials.
Applying Vertex Maps to Materials
There are different ways to apply RealFlow | Cinema 4D's vertex maps to a material, and here we want to present a method with two materials. Create two materials with differtent colours, e.g. blue and white:
- Blue will represent the slower particles, white is used to visualize faster particles.
- Apply the materials in exactly this order: 1. blue and 2. white.
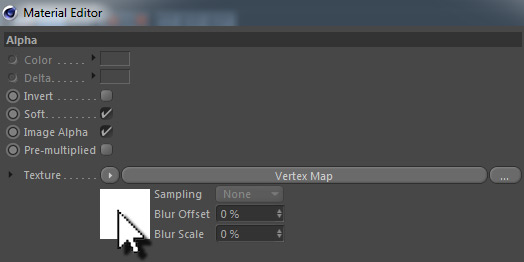
- Enable the white material's "Alpha" property. Under "Texture" choose on Effects > Vertex Map.
- Click on the white square to open the effect shader's dialogue:
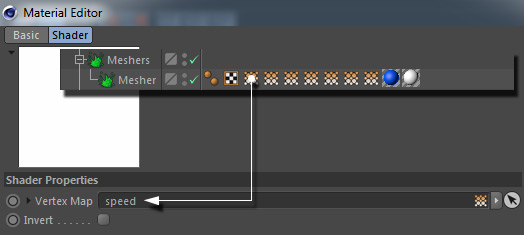
- Drag one of the mesh node's vertex map tags onto the “Vertex Map” slot, for example ""speed".
Adjusting the Vertex Maps
Render an image to see the effect – a preview is not possible. If the result does not meet your expectations increase or decrease Mesh > Channels > Channel name > Min and Max values, and change "Smoothing Scale Length" to blur the vertex maps. All mesh areas with channel values
- smaller than "Min will be rendered with the same material colour – here: blue
- greater than "Max" will be rendered with the same material colour – here: white.
If you are not sure which values to enter enable the channel's "Auto" mode and you will see the current lowest and highest values. These values can be used as references. Alternatively you can use the "Auto" mode as well.
"Smoothing Scale Length" ranges between 0 and 1 (0 = no smoothing, 10 = maximum) and helps to avoid flicker and improve the transition between the colours/materials:
- When "Smoothing Scale Length" is being changed the meshes have to be rebuilt or recached!