Mesh Weight Vertex Maps
- thomas (Unlicensed)
- Hector Artal (Unlicensed)
In simulations with two more more fluids or emitters RealFlow | Cinema 4D tracks the distances between the particles and creates a weight map. These weight maps can be used to render a blending effect for differently coloured fluids. The workflow is pretty much the same as with → channel vertex maps, but there are a few things to consider.
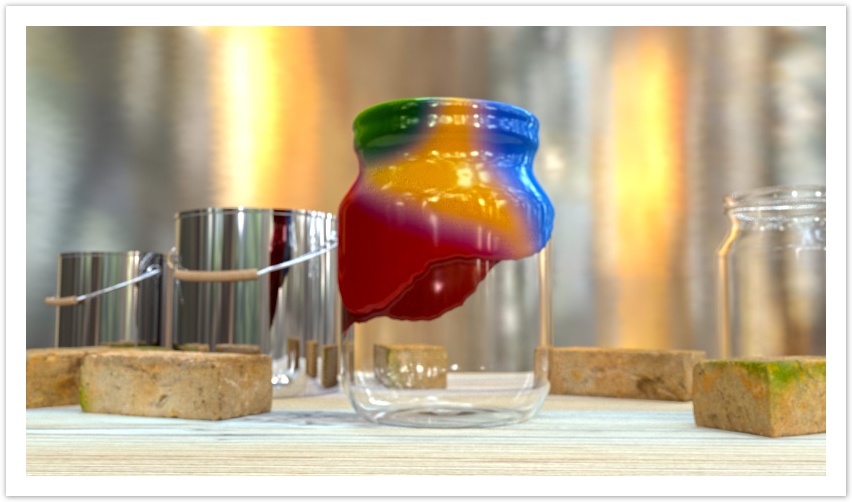
A still from a simulation with four fluids mixing while running down a glass jar.
Let's start with how to blend two particle sources – you can use up to nine weight maps per mesh node:
- Create a simulation with two fluids or emitters – there is nothing special you have to consider, but the particles should mix at some point in time.
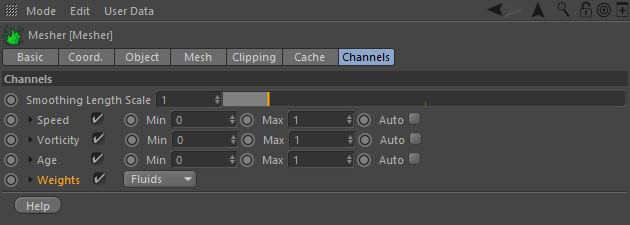
- Add a "Mesher", go to → Mesher > Channels, and enable the "Weight" option.
- Choose, whether the weight vertex maps should be created from "Fluids" or "Emitters".
- If you have two (or more) fluids then both containers have to be meshed together!
- Create the mesh as usual.
Material Setup
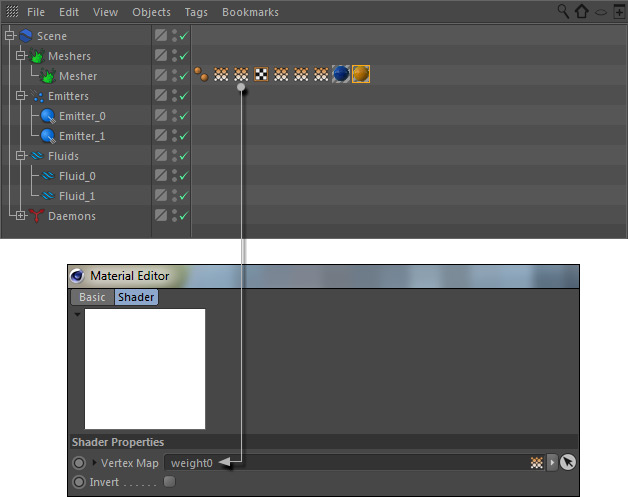
That's everything you have to do in terms of simulation and meshing. When the → building of the mesh or the → caching is finished you will see two new vertex maps: "weight0" and "weight1".
In order to render blending fluids with weight maps you have several options, e.g. with gradients, Cinema 4D's "Fusion" shader, or by stacking two materials. Here we want to go on with the 2-materials method:
- Create two materials and decide which one should be the base and top colour.
- Apply the base material first, then the top colour.
- Open the materials and create "Alpha" channels. Add Alpha > Texture > Effects > Vertex Map, and click on the white thumbnail.
- Drag "weight0" the base material's empty "Vertex Map" slot, and "weight1" to top material's slot.
Adjusting the Weight Maps
The blending effect can be previewed – even at meshing time – when you click on one of the vertex maps. If the result does not meet your expectations increase or decrease Mesh > Channels > Weight > Min and Max values, and change "Smoothing Scale Length" to blur the vertex maps (requires re-meshing!).
All mesh areas with channel values
- smaller than "Min will be rendered with the same material colour – here: blue
- greater than "Max" will be rendered with the same material colour: here: yellow.
If you are not sure which values to enter enable the weight property's "Auto" mode and you will see the current lowest and highest values. These values can be used as references. Yiu can alos expand the "Weight" parameter and adjust colours with a gradient.
"Smoothing Scale Length" ranges between 0 and 1 (0 = no smoothing, 10 = maximum) and helps to avoid flicker and improve the transition between the colours/materials.
Working with More Than 2 Fluids & Maps
There are some things to consider with more than two weight maps:
- The maximum number of weight vertex maps is 9.
- In scenes with three or more maps, the last material must not have a vertex map (weitght0) applied, because otherwise you will get a transparency effect in some areas.
Anotations
- RealFlow | Cinema 4D's meshing engine is not responsible for the colour blending effect itself – it only provides an Alpha/vertex map.
Blending colours has some restrictions, introduced by today's render engines:
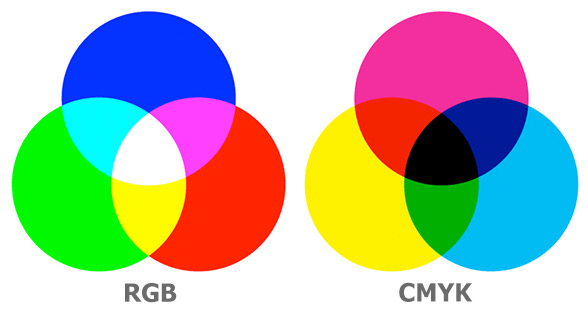
- All render engines use an additive RGB model. This means that mixing red, green, and blue in equal proportions, results in pure white.
- The mixing of subtractive colours (CMYK), on the other hand, results in pure black or – more or less dark – grey tones. This colour model is not supported by today's render engines.
- These fundamental differences between the colour models (RGB vs. CMYK) may result in apparently wrong colours, but in fact they are correct according to the additive RGB model.
Here is the difference between the RGB model, used in CGI/DCC, and CMYK colours, used for printing and painting: