Simulate, Reset, Initial States
- thomas (Unlicensed)
Click on “Simulate” to start the simulation process. A simulation starts at the timeline slider's current position. Another click stops the simulation; in order to resume, please click on “Simulate” again. When you resume
- The simulation starts at the timeline slider's current position.
- Previously simulated frames (indicated by orange bar in the timeline) will be overwritten, but not without confirmation.
With “Reset” all previously simulated files will be removed from RealFlow, but not from the disk. Unless you hit “Simulate”, all previously existing cache files are still available, and can be reloaded with Alt + U (“update timeline cache”) or this button:
![]()
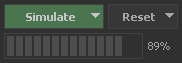
The bar below the buttons displays the current frame's progress of simulation or meshing tasks in percent (0 – 100).
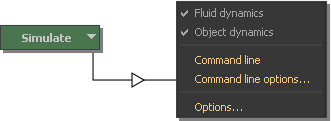
Next to “Simulate” and “Reset” you will find small triangles. A click reveals submenus:
Simulation Submenu
The main entries here concern RealFlow's → command line version, and the → “Simulation Options”. Since both tools require further explanation they are discussed separately. Please follow the links above for more information.
Reset to Initial State Submenu
An initial state preserves a node's current simulation state. You can create this initial state from any simulated frame, and RealFlow will store a file in a separate folder (“initial state”) of the project. Please bear in mind that it is not possible to create initial states for all scene nodes at once, but they have to be created individually:
- Simulate and choose the frame you want to preserve as an initial state.
- Select the node you want to use with the initial state.
- Node Params > Initial State > Make Initial State
- Node Params > Initial State > Use Initial State > Yes
- Reset > Submenu > Reset to Initial State (see below)
- Reset. The timeline cache will be emptied and the simulation can be started again from 0, but this time the initial state is used.
- Simulate.
