The Advanced Material Editor (MXED)
The Material Editor (and the whole material system) is one of the most important elements of Maxwell Render™. It provides a powerful set of parameters for advanced editing of a Maxwell material.
It is possible to create Sub-Surface Scattering effects (see below), thin layers, light-emitting materials and advanced stacked materials. A material in Maxwell Render can have several layers, one stacked above the other much like layers in an image editing application, and each layer represents a material in itself (that can be composed by several components).
This makes it very easy and intuitive to create interesting and complex materials, such as a rust material showing through a car paint material, or applying a logo on top of a combination of different materials. A large library with thousands of free, ready-to-use materials is also available.
Editing Materials in plugins, Maxwell Studio, MXED
You can create and edit materials in three different ways:
- directly in your host application using the controls provided by the plugin. Most of our plugins have all the material parameters available to you.
- with Maxwell Studio - the standalone scene creation and editing tool included with your installation of Maxwell.
- with MXED - the standalone Maxwell material editor also included with your Maxwell installation.
All three approaches can be useful, even if your plugin fully supports all Maxwell material parameters. For example you may wish to quickly open and edit an MXM file (a Maxwell material file) found on your machine. For this, MXED can be very practical.
While the Material Editor is implemented inside all the compatible plugins, the interface and/or functionality can be different depending on each 3D platform, but the underlying principles remain the same.
The information below shows the main areas of the material editor found in Maxwell Studio and MXED. In your 3D platform the interface may be slightly different.
MXED Interface
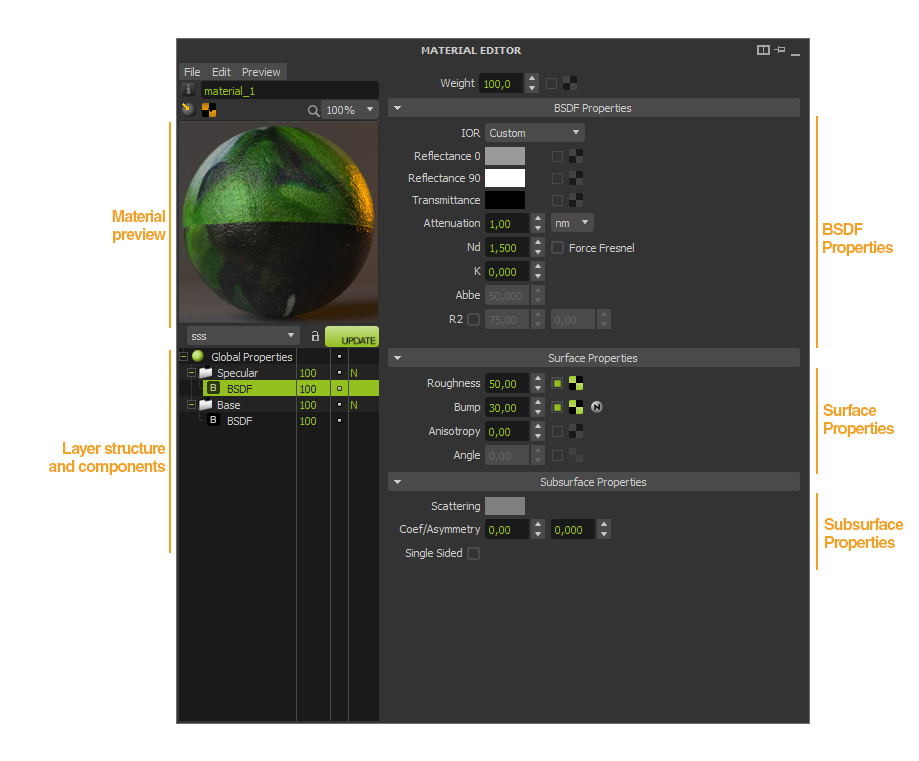
Main areas in the Maxwell Material Editor as seen in Studio and in the MXED (Material Editor standalone)
The top menu bar contains the following menus:
- File: create, open, save export, pack and go the current material to file or even save a copy while you keep working on your original one. You can also add a description to your material, check its texture files or even load one material from a given scene. The Preferences panel of the MXED is also accessible from here, from where you can create your texture repository paths or enter your MXMGallery credentials to directly access the whole material online collection in the MXMGallery from your MXED.
- Edit: manage the components of a material, adding BSDFs, emitters, coatings, displacements, layers, etc.
- Preview: allows you to choose the scene to be used in the material preview, from a given list or any other you can create. The Options panel allows you to manage the quality of the preview render, setting its Sampling Level, Time Limit, Scale of the render and even the engine used for the previews (Draft, meaning Fire, or Production).
- Save MXS file as: a quick access to save your current material to a MXM file in disk.
Aside from the menu bar, the material editor can be split in five main areas:
1. Layers Tree
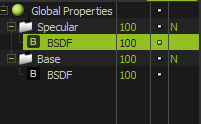
Maxwell Render’s materials are made up of different “components” which are organized into folders (Layers). Each Layer can hold one or more BSDF components (BSDF is the main material definition), plus one Coating (varnish), one Emitter and/or one Displacement component.
Each folder represents a Layer, which are stacked vertically one on top of the other, similar to layers in a 2D image editing application. Please see the Stacking Layers section for more information about this.
The Layers tree
2. Material Preview
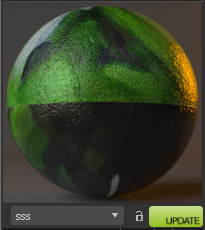
This window allows you to get a quick preview of the material while you are editing it. When you are changing material parameters, double-click in the preview sample image to refresh the preview with the new parameters, or click on the Refresh Preview button (green double-arrow icon). During the preview, the green icon will be replaced by a red square icon, to indicate that it is calculating your preview.
The Preview window
Right-click in the Preview to show a menu with the following options:
- Scene selections: You can choose a different preview scene from the list, load the Next/Previous scenes in the list or load an MXS to use as a preview scene. The list is populated from the MXS files found in the "preview" folder found in the Maxwell Render install folder. To learn how to create your own preview scenes, see below.
- Previews: While experimenting with different material settings, the Previews option allows you to store a material "snapshot" of your current settings. Use Store to store the current settings and Remove to remove the currently displayed preview. You can use the white back/forward arrows beneath the preview window to quickly jump between different stored previews.
- Export...: Allows you to export your current settings to an MXM file.
- Options: Set the different preview options - Sampling Level, Time, Scale and Quality.
Real-time material editing
Pressing the lock icon in the lower right of the Preview will enable real-time editing of all material settings - the preview will update as soon as you change a setting. Unlock it to return to normal mode - you have to double-click the Refresh Preview button for the preview to refresh.
Choosing which texture to display in the viewport (Maxwell Studio)
Clicking the black/orange squares icon shows a list of the current textures applied to the material. Pick a texture to choose to display it in the viewport in Maxwell Studio. You must set your shading mode to Textured or Textured decal for textures to be shown in the viewport.
Creating your own preview scenes
Any MXS file can be used as a preview scene - you only need to have a material in that scene called "preview" which is applied to an object, and you also need to have a light source in the scene (Environment lighting or Emitters). The "preview" material will be replaced by your current material when previewing the scene.
To have your MXS preview scene show up in the right-click menu, place it in the "preview" folder of your Maxwell Render install folder.
- Try to make your preview scenes as efficient as possible to get fast previews - for example a simple object and one emitter is usually enough.
- Use approximately the same scale for your objects in the preview scenes compared to the scale of the objects you plan to use this material on to get a better idea of how it will look on those objects.
- Create different scenes for different purposes - if you want to see better what a transparent material will look like for example, place something behind it to see how much it refracts the light.
3. BSDF Properties
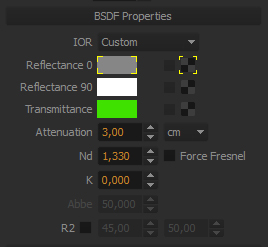
Contains the parameters to control the main physical behavior for each material component.
The BSDF properties of a material
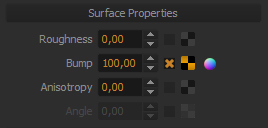
4. Surface Properties
Parameters to control the surface properties of a material (mainly the physical roughness or smoothness of the surface itself).
The Surface properties of a material
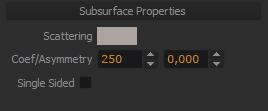
5. Subsurface Properties
Parameters to control the internal behavior in case of a translucent material, commonly referred to as Sub-Surface Scattering (SSS).
The Subsurface properties of a material
The Color Picker
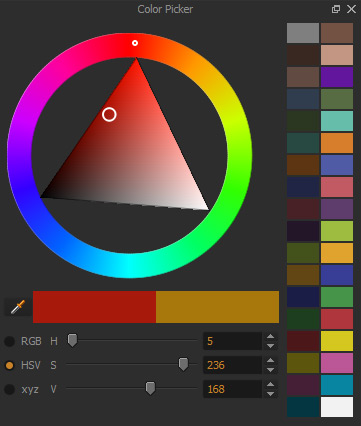
When you click on a color chip, the Color Picker opens (in a separate window when using MXED standalone, or the Color Picker panel in Maxwell Studio).
The Color Picker panel
To control the Hue: click and drag in the outer circle
To control the Saturation & Value: click and drag in the triangle
The two large color bars beneath the main color wheel let you compare the color that was selected when you clicked the color chip to open the Color Picker (right color) and the new color you've chosen (left color) in case you've edited the color. This lets you make fine adjustments to a color by seeing the old color next to it.
The Pipette icon lets you pick a color from anywhere in the MXED or Maxwell Studio UI. Click once to activate it, and then select a color.
The color chips on the right let you store your favorite colors. Simply drag & drop the color from one of the two large color bars to one of the color chips to store that color. Click on a color chip to load that color.
You have three color modes available for selecting colors: RGB, Hue Saturation Value (HSV) and xyz.
Material Browser
For information related to the browser panel, please see the Resources Browser Panel page in the Maxwell Studio section of the manual.
