A Hybrido setup is a matter of just a few clicks. The basic scene we create here will be the starting point for various workflow simulations with Hybrido's secondary fluids (splash, foam, etc.).
The Environment
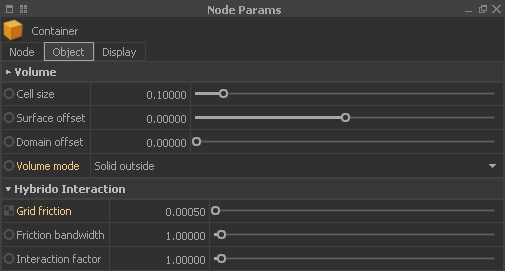
Start with a “Cube” node from the “Objects” shelf. Under → “Nodes” double-click on “Cube01” and rename the node to “Container”:
- Node > Scale > 10 | 10 | 10
- Volume > Volume mode > Solid outside
- Hybrido Interaction > Grid friction > 0.0005
Add another cube:
- Rename it to “Emission object”.
- Set its horizontal “Scale” values to 10 and 3.0, height is 3.5 metres.
- Move the cube with W key or the “Position” settings until it looks as shown below (blue box).

We also want some collision objects:
- Create four “Cylinder” objects as seen above or or import (Ctrl/Cmd + I) them from your 3D program.
- Apply different scale settings and spread them inside the “Container”.
- Make sure that they are not inside the “Emission object”.
- Rename them to “Pillar01” ... “Pillar04”.
Now we need two daemons from the appropriate shelf:
Gravity
k Volume
k Volume > Fit to object > Container
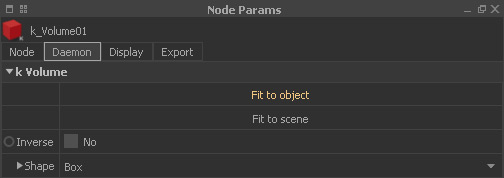
This is the basic environment where the fluid simulation is going to take place. The container acts like a pool, the “Emission object” node defines the water volume. The → “k Volume” daemon will remove escaping particles.
The Hybrido Domain Setup
Go to the “Hybrido” shelf and add the following nodes:
- Open Domain
- Emitter
- The emitter requires an object where the fluid is created – choose “Emission object”.
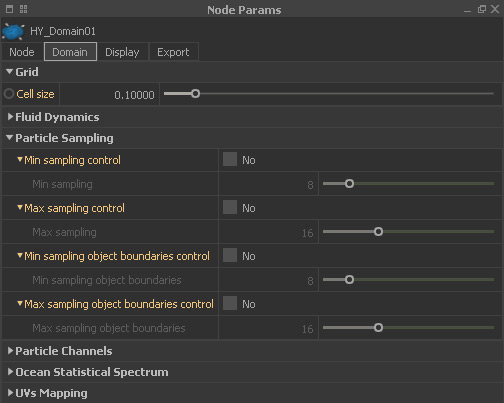
That's already everything and we can start with the domain's settings:
- Grid > Cell size > 0.1
- Creation mode > Dense will speed up the simulation.
- Particle Sampling > disable all “control” options, because we want to keep the number of particles constant throughout the simulation.
Let's proceed with the “HY_Emitter01” node:
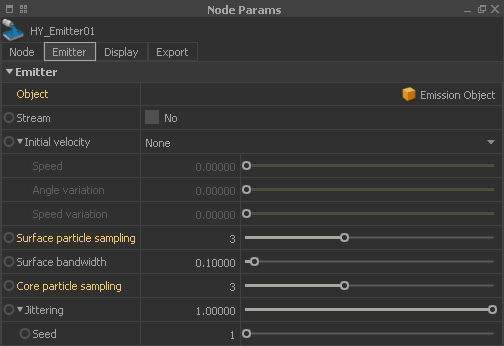
- Under “Object” you should see “Emission object”.
- Surface particle sampling > 3
- Core particle sampling > 3
- These values are applied once at the beginning of the simulation and create 3 x 3 x 3 = 27 particles per cell.
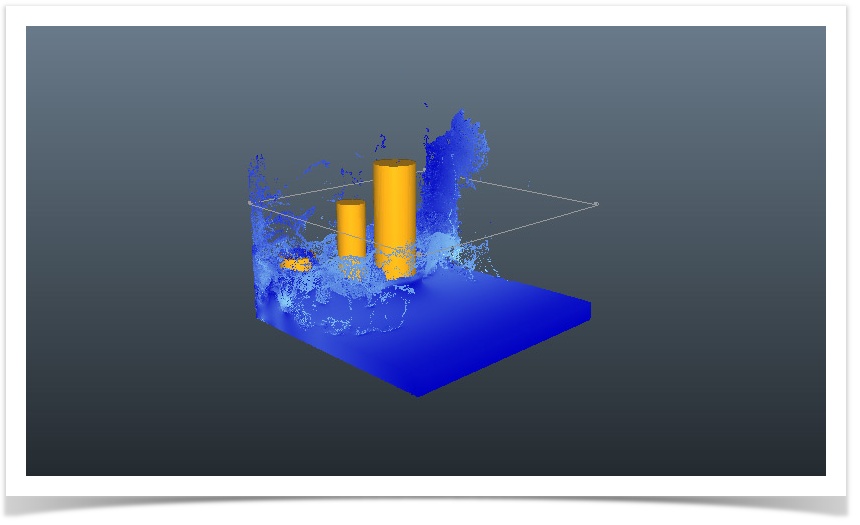
When you simulate your viewport should look similar to the first image above. We have created a collapsing water column that crashes against the pillars and the container's inner walls. These interactions are responsible for the impressive splashes.