RealFlow's shelves are treated independently from the rest of the UI. This means that all changes will be applied to the UI immediately and stored. There is no need to save a layout file.
Editing Shelves
- Click on a tab, hold the mouse pressed and drag it to a new position.
- Shelves cannot be placed outside the shelf area.
A shelf's elements, also called commands, are moveable:
- Open the shelf and right-click on a free area.
- From the menu choose “Edit shelf...”.
- A new window with three columns appears.
- In the middle column drag and drop the elements to their new positions – a white line indicates the new place.
- Click on “Close”.
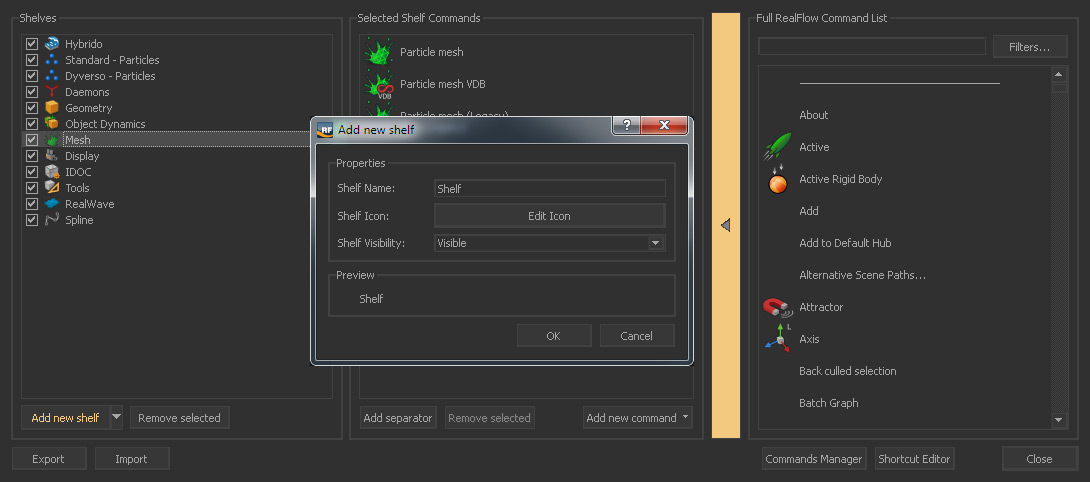
Adding Shelves
New shelves can also be added:
![]()
- Tools > Shelves Manager (see icon above)
- In the appearing window click on “Add new shelf”.
- Specify a name and an icon.
- In the left column, choose the newly created shelf
- In order to fill the shelf with commands follow the steps under “Adding Commands” below.
Adding Commands
Shelves can be filled with commands – a command can even appear multiple times in the same shelf:
- Tools > Shelves Manager (see icon above)
- In the left column, choose a shelf.
- In the right column, choose which command(s) you want to add.
- You can use the search field to look for a specific command or apply "Filter...".
- Add the command(s) by clicking on the large vertical button with triangle (see image above).
- Commands appear in the middle column, where they can be reorganized with drag and drop.