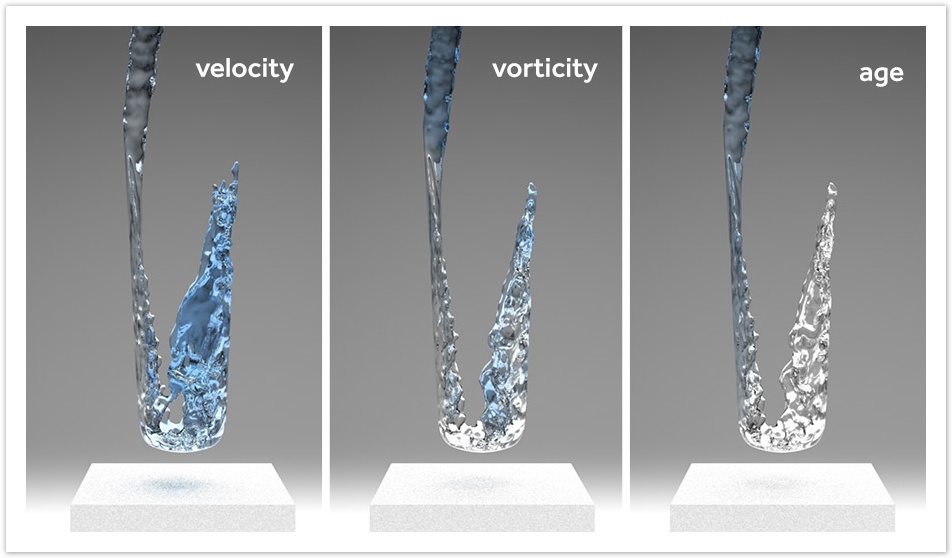
RealFlow | Cinema 4D particles are differently coloured according to their velocity, vorticity (has to be activated separately under → Fluid > Fluid > Compute Vorticity), or age values. These values can be transferred to meshes and rendered, adding some extra realism.
Vertex Maps
When you take a look at the "Mesher" object you will recognize three "Vertex Maps" tags representing the fluid's velocity split into X,Y, and Z components:
- The "Mesher" object's "Channels" tab provides even more possibilities: "Speed", "Vorticity", "Age" and "Weight" (see next image below).
- If you want to use "Vorticity" you have to activate → Fluid > Fluid > Compute Vorticity before the simulation, otherwise the channel will not be available.
- The "Weight" channel is only available if the simulations contains at least two emitters or fluid containers, and requires a slightly different → workflow.
The complete selection of channels with "Scale" values to blend materials.
Applying Vertex Maps to Materials
There are different ways to apply RealFlow | Cinema 4D's vertex maps to a material, and here we want to present a method with two materials. Create two materials with differtent colours, e.g. blue and white:
- Blue will represent the slower particles, white is used to visualize faster particles.
- Apply the materials in exactly this order: 1. blue and 2. white.
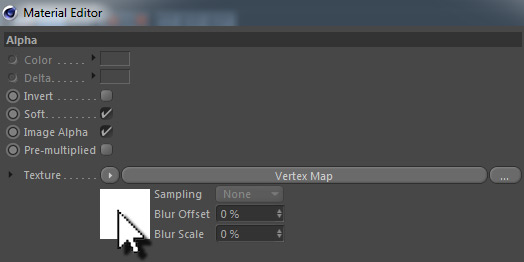
- Enable the white material's "Alpha" property. Under "Texture" choose on Effects > Vertex Map.
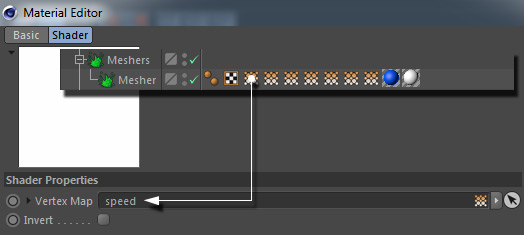
- Click on the white square to open the effect shader's dialogue.
- Drag one of the mesh node's vertex map tags onto the “Vertex Map” slot.
Rendering the Mesh
Render an image to see the effect – a preview is not possible. If the result does not meet your expectations increase or decrease Mesh > Channels > Channel name > Scale.


