Image courtesy of Quentin Chaillet (www.qchaillet.com)
Broadly speaking, to render a scene, Maxwell casts rays to all pixels in the image (considering the camera sensor as a whole). But very often, the noise ends up being concentrated in certain areas, and so sometimes it would be useful to focus the rays only on those areas selected by the user. Very often the render looks generally fine except for those parts where, due their particular lighting and material characteristics, they are still noisy and need more rendering. So instead of continuing to render the whole frame (which will require rendering effort in areas that are already clean), you can put all the render power into refining specifially areas that you choose. This is when the Extra Sampling feature can help. With this feature, you can define an area to be rendered to a higher Sampling Level than the general frame, so you can distribute the rendering effort on your scene in a smarter way and save a huge amount of time, optimizing the render process as it is refining only the areas of your choice. In fact, the saving in time is directly related to the proportion of pixels sampled in the mask on the global frame.
Defining a sampling zone
...
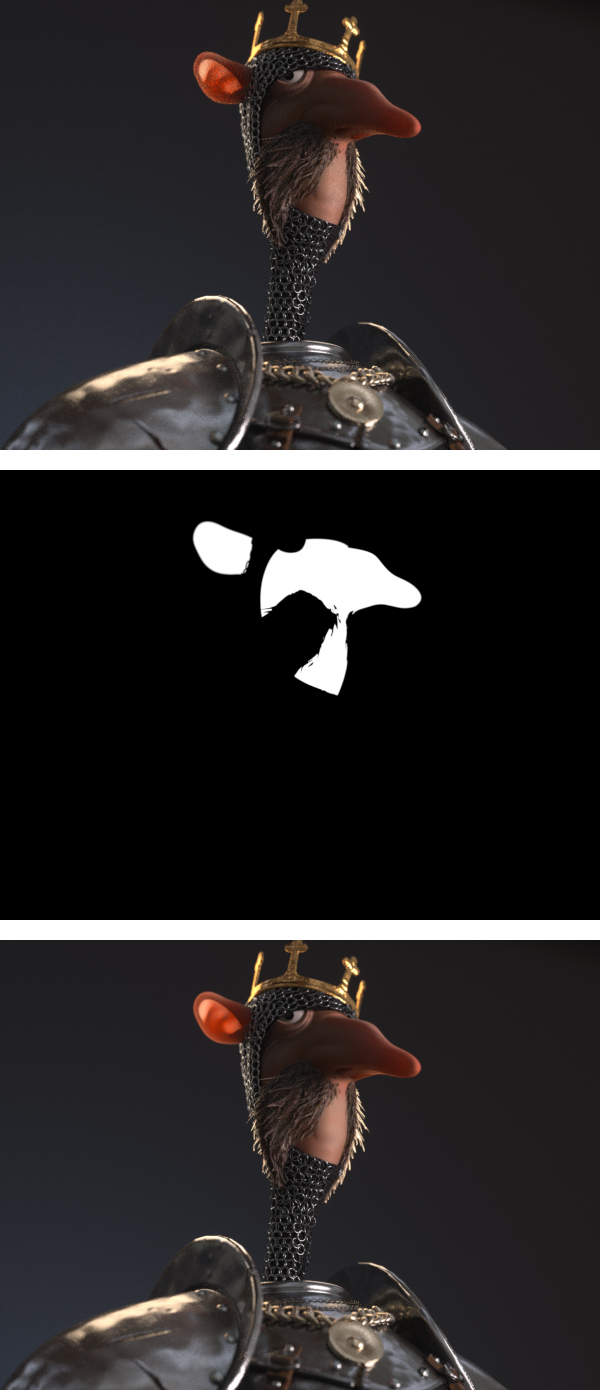
- Bitmap, feed with an existing black and white mask in any image format, manually painted or, more frequently, generated from an external channel export.
- Alpha, use the scene Alpha channel obtained during the full frame process.
- Custom Alpha, use any Custom Alpha channel –from object, material or even groups of objects and materials– defined on the scene and obtained during the full frame process.
...
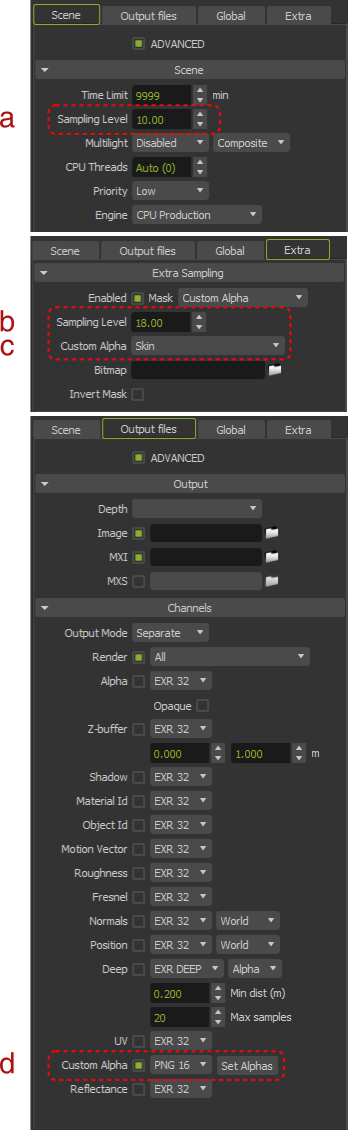
- Set the global Sampling Level or Time Limit as usual for the full frame step (a)
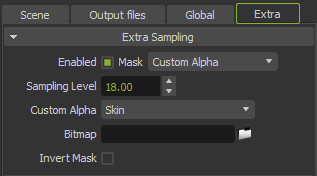
- Enable the Extra Sampling feature and set the new Sampling Level for the selected area (b) and the mask (c). Of course, the extra Sampling Level must be higher than the global SL set for the full frame
- In case of using the Alpha channel or a Custom Alpha channel of the same render as the sampling mask, that channel has to be obviously enabled (d).
| Center | ||||||
|---|---|---|---|---|---|---|
| ||||||
During the render
During the first step of the render process, the engine is rendering the full frame as usual. The SL parameter indicates the global sampling level of the whole image as with any regular render. The Extra Sampling parameter aside displays n/a (not activated), indicating that the extra sampling has not started. (and indicates that the render is still operating in full frame mode).
...
You can visualize what parts of the image are actually being rendered by hitting the "E" key, or by choosing Show Extra Sampling Mask in the right-click menu. Maxwell will use a red mask to show the areas that are not being rendered, maintaining in its true color the parts of the image currently rendering.
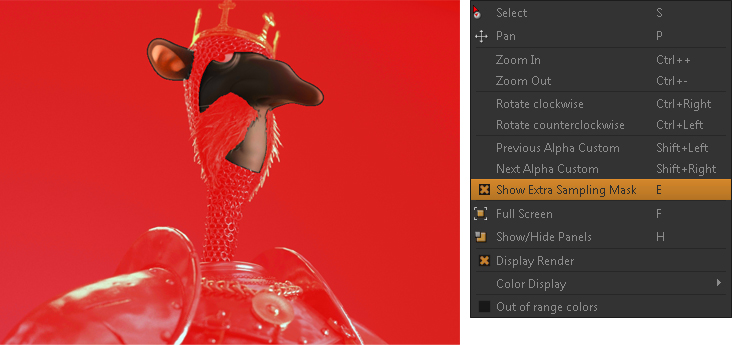
Maxwell can display what areas of the image are not being rendered (masked in red) and what areas are currently rendering (in true color),
by hitting the "E" key or enabling Show Extra Sampling Mask in the right-click menu (right)
At any moment during a render, you can check the Sampling Level of a pixel by simply hovering the cursor over the image. The bottom information bar in Maxwell displays the Sampling Level of the selected pixel, so you can easily check the SL of any part of your image.

The bottom information bar in Maxwell displays the Sampling Level of the pixel underneath the cursor
A note on Sampling Level for heterogeneous renders
...