...
- Create two materials and decide which one should be the base and top colour.
- Apply the base material first, then the top colour.
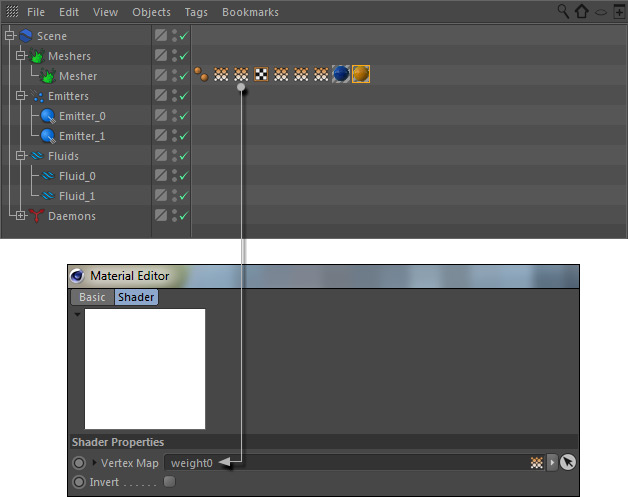
- Open the top colour and create an "Alpha" channel. Add Alpha > Texture > Effects > Vertex Map, and click on the white thumbnail.
- Drag one of the weight vertex maps to the empty slot.
Rendering the Mesh
Render an image to see the effect – a preview is not possible. If the result does not meet your expectations increase or decrease Mesh > Channels > Weight > Min and Max values, and change "Smoothing Scale Length" to blur the vertex maps.
All mesh areas with channel values
- smaller than "Min will be rendered with the same material colour – here: blue
- greater than "Max" will be rendered with the same material colour: here: white.
If you are not sure which values to enter enable the weight property's "Auto" mode and you will see the current lowest and highest values. These values can be used as a references. Alternatively you can use the "Auto" mode as well.
"Smoothing Scale Length" ranges between 0 and 1 (0 = no smoothing, 10 = maximum) and helps to avoid flicker and improve the transition between the colours/materials.
Annotations
As mentioned in the introduction there are some things to consider with weight maps:
...
