...
- Create two materials and decide which one should be the base and top colour.
- Apply the base material first, then the top colour.
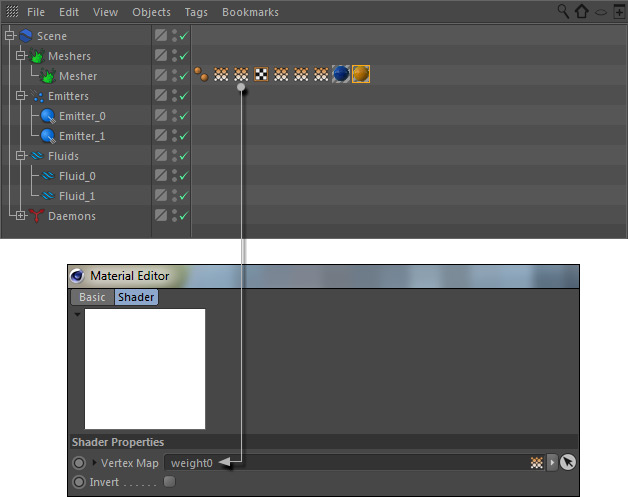
- Open the top colour materials and create an "Alpha" channelchannels. Add Alpha > Texture > Effects > Vertex Map, and click on the white thumbnail.
- Drag one of the weight vertex maps to the empty "weight0" the base material's empty "Vertex Map" slot, and "weight1" to top material's slot.
Adjusting the Weight Maps
Render an image to see the effect – a preview is not possible. If the If the result does not meet your expectations increase or decrease Mesh > Channels > Weight > Min and Max values, and change "Smoothing Scale Length" to blur the vertex maps (requires re-meshing!).
All mesh areas with channel values
- smaller than "Min will be rendered with the same material colour – here: blue
- greater than "Max" will be rendered with the same material colour: here: whiteyellow.
If you are not sure which values to enter enable the weight property's "Auto" mode and you will see the current lowest and highest values. These values can be used as a references. Alternatively you can use the "Auto" mode as well.
"Smoothing Scale Length" ranges between 0 and 1 (0 = no smoothing, 10 = maximum) and helps to avoid flicker and improve the transition between the colours/materials.
...
- The maximum number of weight vertex maps is 9.
- RealFlow | Cinema 4D's meshing engine is not responsible for the colour blending effect itself – it only provides an Alpha/vertex map.When you work with more than two fluids/emitters then the base colour must not have a vertex map applied.
Blending colours has some restrictions, introduced by today's render engines:
...
