This channel is a grayscale image that represents the shadows received by objects that have a material applied to them with the “Shadow” option turned on. This is useful to composite the shadows cast by a rendered object into a photograph. The “Shadow” option must be enabled for the desired shadow-catching material. This option is enabled from the Material properties of the material:
In your compositing application (image or video compositor), the shadow channel should be placed in a layer between the main render channel and your background, and set to Multiply blending mode. This will render invisible any white areas of the shadow pass while keeping only the non white areas. The shadow channel can be further enhanced by coloring it to better fit the back plate.
The shadow channel in Maxwell Render takes into account the full GI of the scene. It also updates to keep track of any Multilight changes you make in the render (see "Shadow channel together with Multilight" further down the page). This makes it much more advanced and practical than the typical 'inverted alpha' shadow passes in other renderers.
Rendering diffuse, alpha and shadow pass at the same time
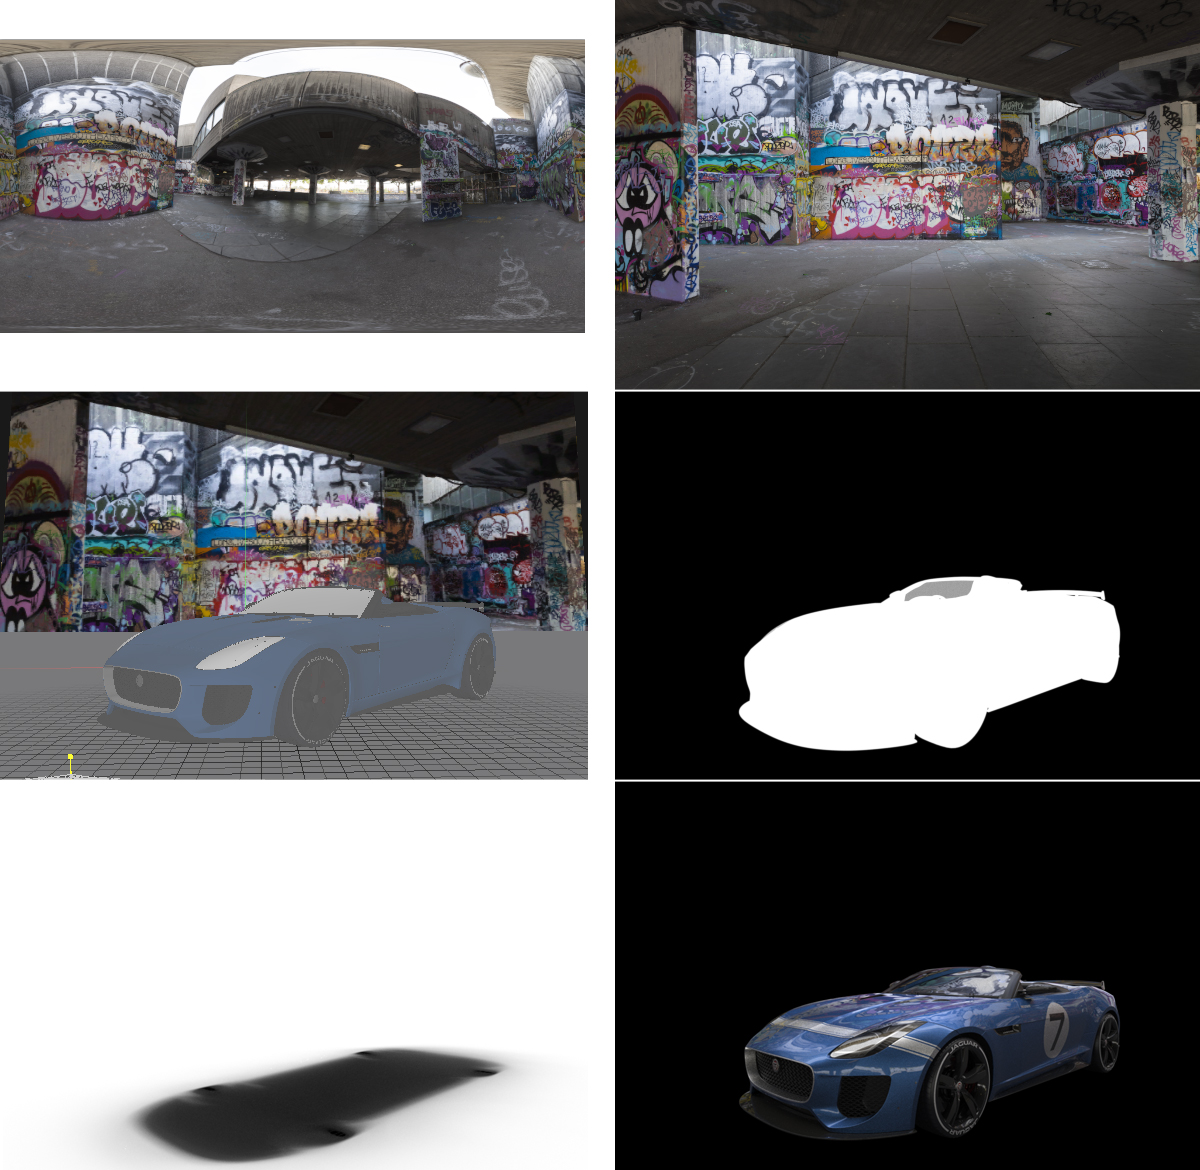
The example below shows a car rendered on a plane, with the shadow option turned on for the material applied to the plane, and the plane's object properties set to Hidden from Camera. This way you can render both the Alpha channel and the Shadow channel at the same time without the planes alpha getting in the way (we only need the alpha for the car).
Images from top left to bottom right represent: HDR map used, Backplate photo, scene layout showing the car and the ground objects, Alpha channel, Shadow channel (full shadow) and Main render.
Render channels. Click the image to enlarge it
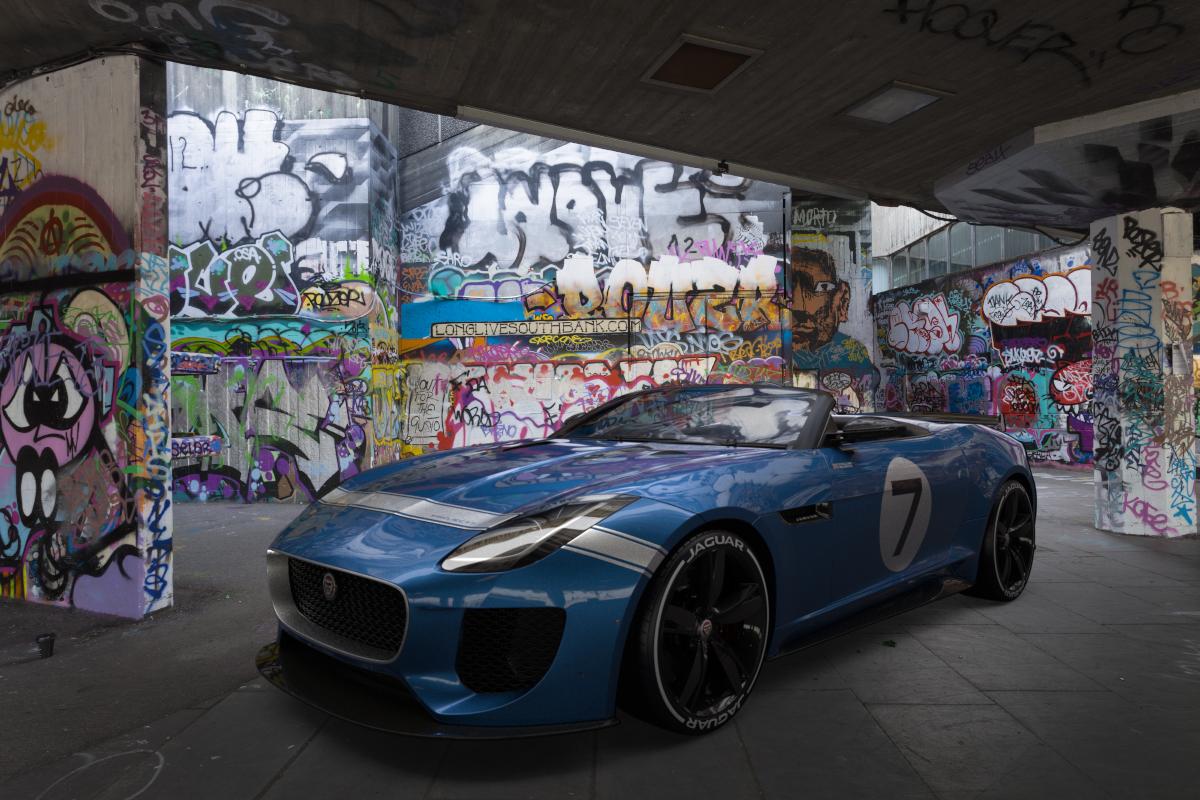
Final composite. Scene, model and HDRI plates courtesy of Nikos Nikolopulos
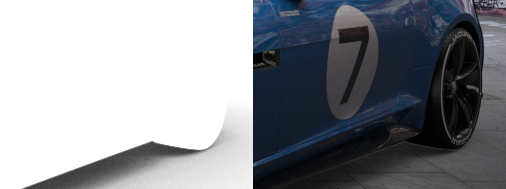
Knocked out shadow pass vs Full shadow pass
By default when you choose to render a shadow pass, any visible objects in the render will become fully white in the shadow channel, thus obscuring parts of the shadow channel. This is done in order to be able to render both the main render and a shadow channel at the same time. It can however cause problems when compositing this knocked out kind of shadow pass with objects that have been cut out from the background using an alpha channel. You may see a few faint white pixels along the borders of the object and the shadow pass, depending on the brightness of your background and the objects.
Knocked out shadow pass and composite
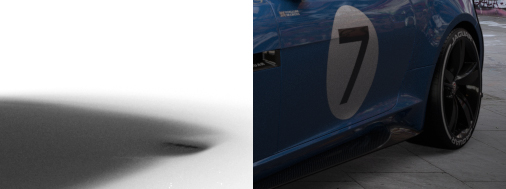
Full shadow pass (rendered with the 'Hidden from Camera in Shadow Channel' option) and composite
The solution is to set the 'shadow-caster' object not to be visible in the Shadow Channel, option that you can enable on the 'shadow-caster' object visibility panel. This way, the object won't occlude the calculation of its own shadow, producing a full shadow in the Shadow Channel that causes no white pixels border when composed.
Hidding the car to appear in the Shadow Channel to get a full rendition of its shadow
Shadow receiver (usually the ground) | · Enable the Shadow option (material level) · Hidden from Camera (object level) |
Shadow caster
| · Hidden from camera in the Shadow Channel (object level) |
Recipes to properly set the 'shadow-receiver' and 'shadow-caster' objects
Shadow channel together with Multilight
With Multilight on, the output of the shadow channel will include:
- one image showing the combined shadows from all emitters based on current ML settings
- one image for each of the shadows cast by individual emitters
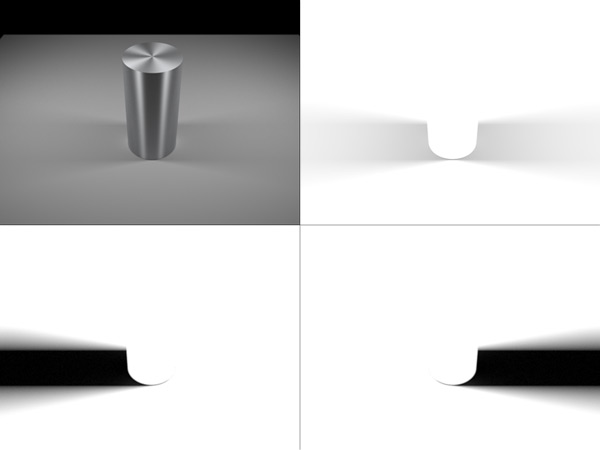
This allows for much greater control when compositing the shadows as each emitters shadow can be manipulated separately, and also the full composite shadow image can be used. Moreover, the composite shadow image will update based on your current ML settings, for example if you increase the brightness of one emitter which brightens the shadow of another emitter, the composite shadow channel will update to show this change.
In the example below, the scene has two emitters, to the left and right of the cylinder. With Multilight on, the render output will produce four images in this case: The main render, the composite shadow channel, two images for the shadow of each individual emitter.
If we now change the intensity of the emitters using Multilight, to make the right emitter weaker for example, the composite shadow channel will update to show this difference also in the shadow channel.

