...
Render from a hair material attached to converted RealFlow fluid particles. The colors are the result of differently colored light sources.
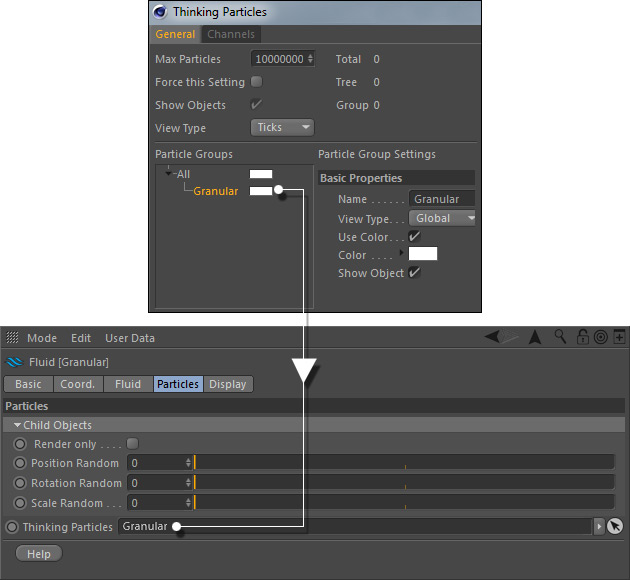
Here are the basic steps (the complete setup can be seen in the screenshot at the end of this page):
- Simulate the RealFlow fluid and activate Fluid > Particles > Create Thinking Particles.

...
The connection between RealFlow | Cinema 4D and "Hair" requires Thinking Particles and a few clicks:
- Open Simulate > Thinking Particles > Thinking Particles Settings...
- Right click on "All" and choose "Add" to create a new group.
- Apply a meaningful name to the Thinking Particles group, e.g. a fluid domain's name.
- Drag the group to the Fluid > Particles > Thinking Particles field.
- Create "Particle Geometry" object from Cinema 4D's Simulate > Thinking Particles menu, and apply a "Hair Render" tag.Open Simulate >
- Drag the Thinking Particles > Thinking Particles Settings and drag the "Fluid" group to the "Particle Geometry " node's "> Object > Particle Group" field.

- Apply a "Hair Render" tag to "Particle Geometry".
- Create a "Hair Material" and adjust its parameters to your needs; apply add it to "Particle Geometry".
- Render.
...