
Yes, render up in the cloud
Maxwell Cloud gives you easy access to a virtually unlimited amount of high-end rendering machines ready to speed up your work and make your deadlines easier for a very reasonable price.
For the moment, we only use the CPU engine and currently, and we can guarantee the use of machines with these minimum specifications: Intel Xeon (Skylake) machines with 96 cores, with a base frequency of 2.0 GHz, full core turbo of 2.7 GHz and a maximum turbo on a single core of 3.5 GHz with 86.4GB of RAM.

In all our products you’ll find a new button to send your Maxwell scene to the cloud. The process is very similar to sending it to the Network System, but you don’t need to deal with the Manager, the Nodes, paths or any network configuration problems. Easy!
Workflow
Maxwell Cloud is handled through the Maxwell Monitor app in a very similar way as a traditional network render. You can send your jobs from it, but usually, the easiest way is just doing it from Studio or the plugin you are using.
All the information related to the Cloud is available under the CLOUD tab; on the other hand, everything related to your local network (the traditional Network Render) will be available under the LOCAL tab.

Toolbar
In the Cloud section, you’ll find this toolbar to manage your cloud jobs:

Command | Function | ||
|---|---|---|---|
Add cloud job | Asks for a file or group of files to create a new Cloud job. | ||
Stop cloud job | Stops the selected Cloud jobs or renders.
| ||
Kill selected cloud job machine | Stops the selected cloud job in a hard way. It kills the cloud machine and the job is not saved at this moment. You will only get the files that were saved before clicking this button. Use only when there’s some error or when you want to stop the job immediately without waiting for Maxwell to save the result up to that moment.
| ||
Remove cloud job | Deletes the selected job or render from your list. This is permanent and you won’t be able to download that job’s images anymore, so please, be careful. | ||
Refresh all | Updates the job list information. | ||
Show/Hide wrong jobs | Toggles between showing or hiding any render with errors. | ||
Show/Hide completed jobs | Toggles between showing or hiding any finished render. | ||
Show selected render IDs | If you want to ask us something or have any trouble with a particular render job, this button will give you all the information that our team needs to identify the job. Copy the details and send them to the support team along with your message (you can send your message to support from here). Please, remember not to delete the job from the list, otherwise we won’t be able to check what happened to your job. | ||
Open cloud job folder | It opens the download folder of a particular job (if it exists). | ||
Preview cloud job | Requests a preview of a particular render. In order to be able to preview the render before it has finished you have to wait for the preview icon to be shown and do not activate the option to “Save the output files only at the end” when creating the job.  | ||
Download cloud job | Downloads a finished job to a folder of your choice. |
This section is related to your user account:

Command | Function |
|---|---|
Contact name | This is only informative and shows the contact name of the user logged in. This user will be the owner of the launched jobs; it can be useful as every account can have several contacts; this way you’ll know who launched each job. Despite the ownership of the jobs, any contact of a particular account can delete, stop or launch any job. |
Profile icon | Shows the contact details as well as the remaining Cloud time. It will also notify if the user is running out of Cloud time. You also have shortcuts to the portal and to buy more time. |
Login / Logout icon | Allows to log in or out of a particular account. The account is the same you use at Next Limit’s portal. |
Adding a job
Once you have set your scene as you want, you can use the Add cloud job button or if you are working from the plugin you only have to click the button to send the scene to the cloud. In the former case, you will get a dialogue to selected the desired files to render and then you’ll be taken to the dialogues below; in the latter case, Maxwell Monitor will open and show you these dialogues:
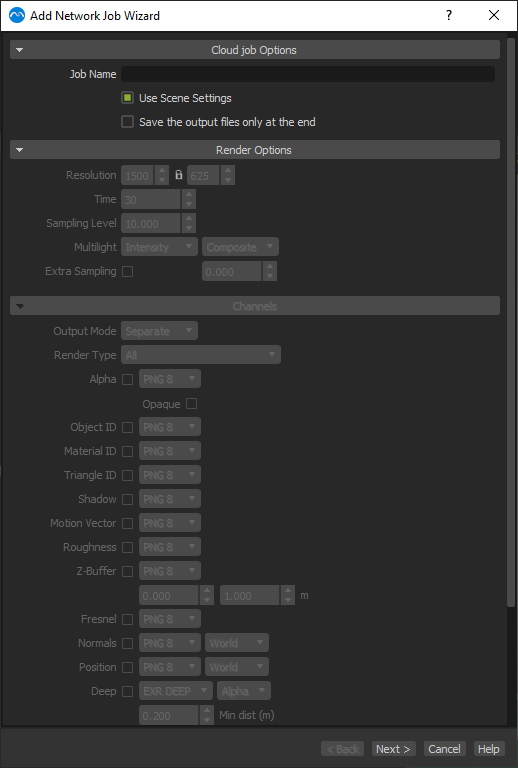
Step1: Customize the job name and main render options
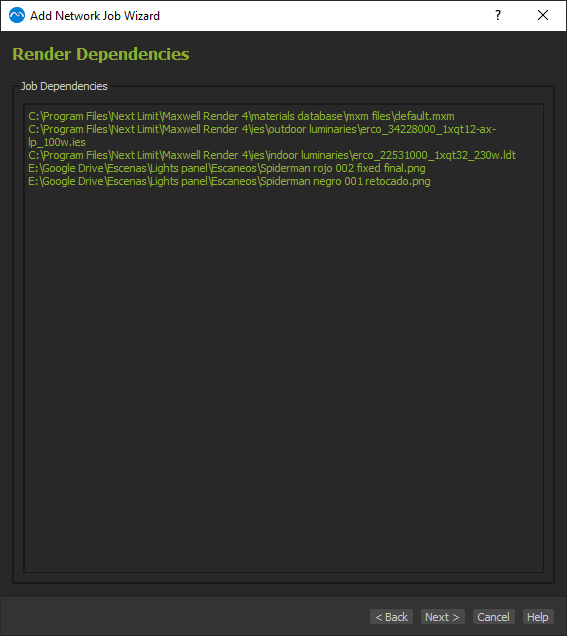
Step2: Dependencies are checked and listed; any missing file will be shown.
In Step #1 you can modify some general options of the render like the Time limit, SL, channels,….
Also, with the option Save the output files only at the end, you can save some rendering time (basically, the intermediate saving time of the different updates as well as the transfer of the rendered image to the server), with the drawback of not being able to preview or download the render until it has finished or you stop it. The time saved can be significant when you are rendering very big images.
Logging in
Before sending the job to the cloud you have to connect to your account. This will be the same customer account you use at the Next Limit Portal.
All the jobs sent to the Cloud will be accessible from any location once you login to the Monitor, so you could send a job from your office and download the render from your home and then from your office again.
The jobs will be kept in your account and will be available for downloading until you delete them.
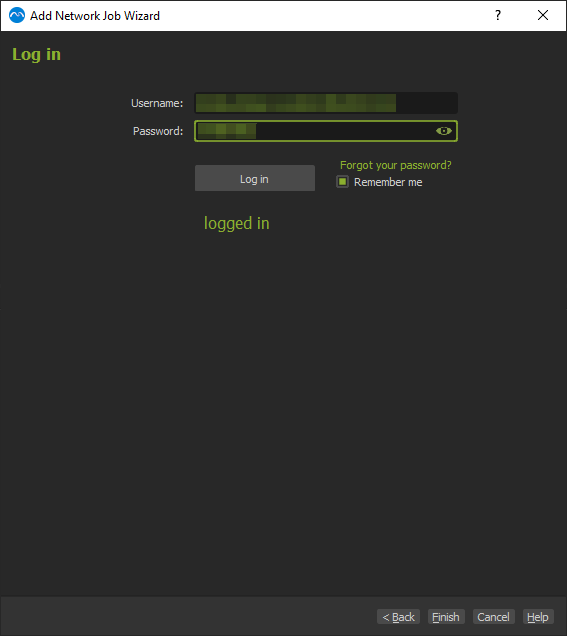
Login window
You can also login using the button from the toolbar:

Jobs list
Once you click on the Finish button, the scene or scenes will be packed along with all the textures and dependencies into a zip file and sent to a cloud.
One machine will be woken up per mxs file, so in the case of rendering animations, all the frames will be rendered more or less at the same time.
The time required to wake up a machine, load Maxwell and the scene may take around 1:30 to 2 minutes (this will be charged too) and after that, the time required to get the preview available may vary between 1 minute or 50 minutes depending on the size of the image and if Multilight is on or not. You will see an icon next to the render status to inform you the preview is available.
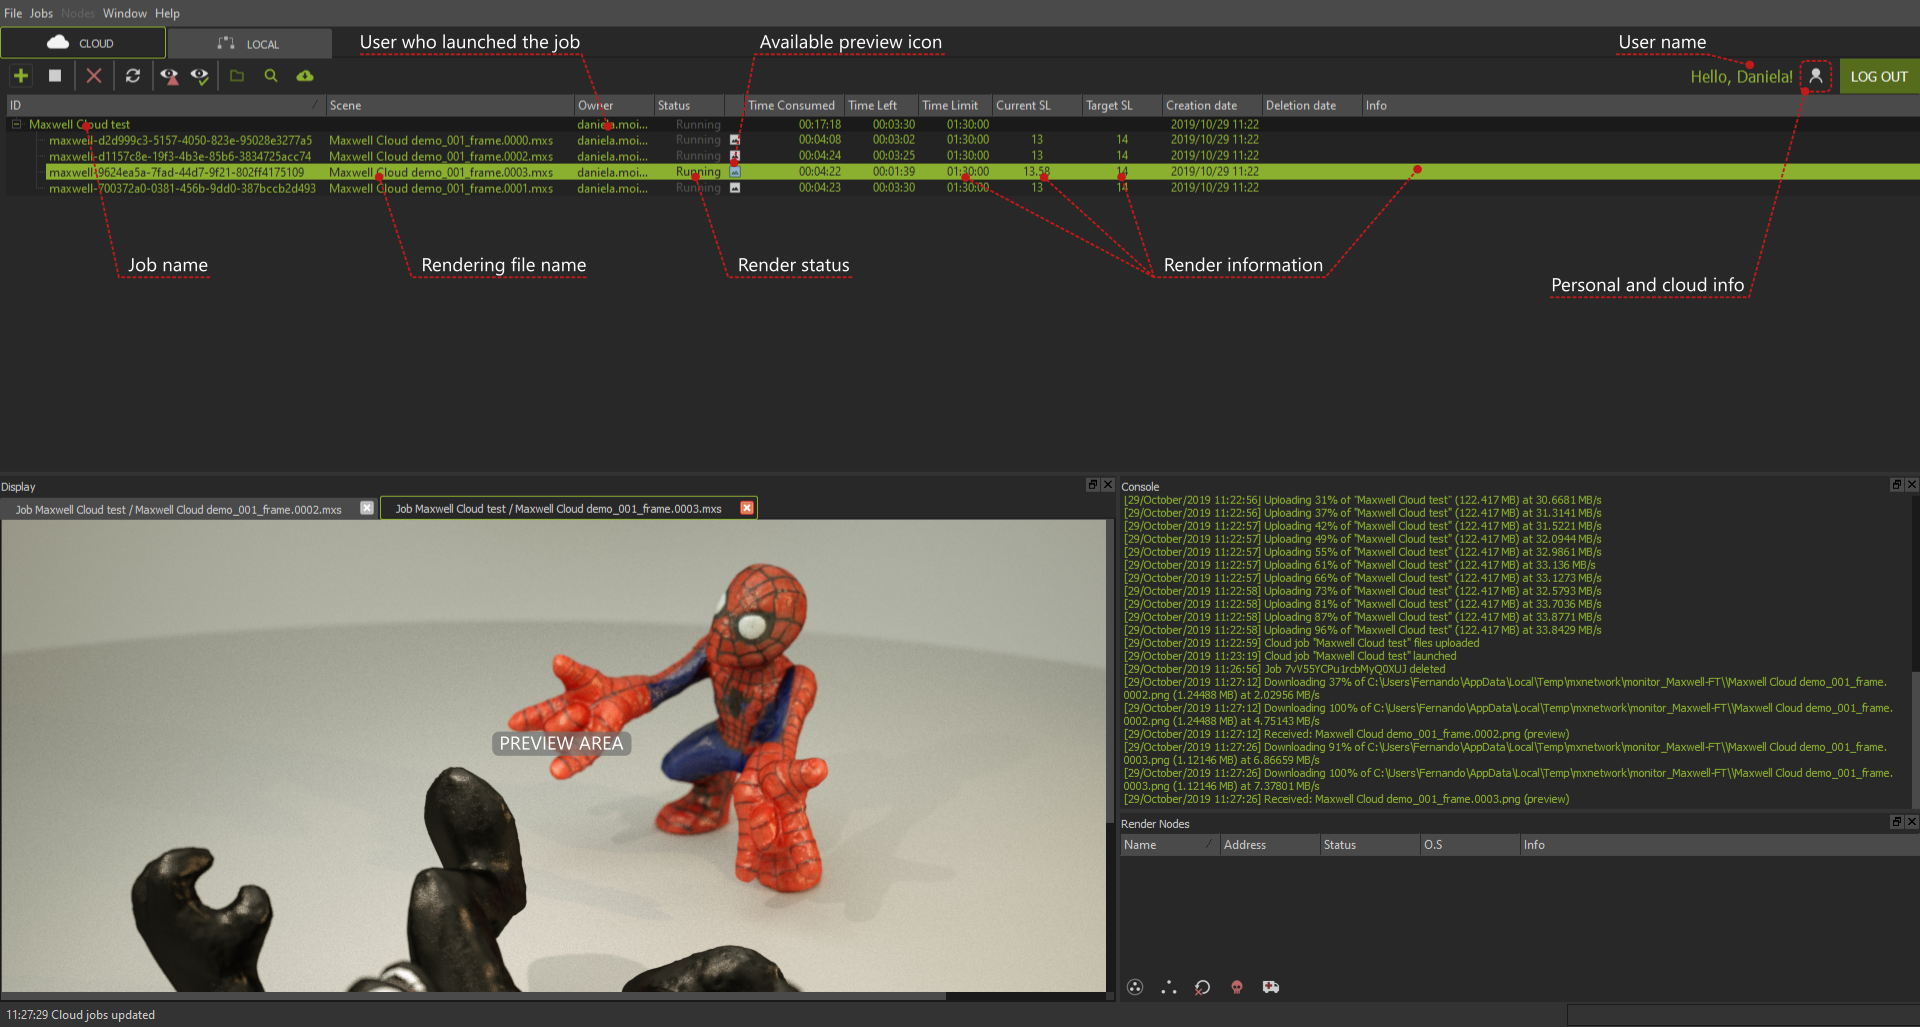
Jobs list showing one job with four renders and a preview.
Downloading the renders
Once the renders are finished (or you decide to stop them) you can click the download button from the toolbar. You’ll be taken to a dialogue to choose where you want to save your files.
Maxwell will create a folder in the chosen location with a name made from the job name or render name and its unique ID and it will include the .mxi file, render and channels of each rendered .mxs plus a log file.
If you choose to download the whole job (which can include several renders), you will get one folder tagged as [Job] with all the files inside; on the other hand, you can choose to download only one of the renders of a job; in that case, you will get a folder tagged as [Render] with only the files of that particular render.
In the Preferences, you can choose the default location of the download folder.
Cloud time
These are the conditions related to the time consumed and charged:
The Cloud time can be bought in packs of 10 hours.
The consumed time is deducted per second.
The time is consumed per machine so, for instance, if you have bought 5 hours of cloud time, you would be able to render one scene for 5 hours or 5 scenes for 1 hour.
The time required to wake up a machine, load Maxwell and start the render will also subtract from the cloud time (normally, it can take around 2 minutes to start rendering).
Once the render has finished or is stopped or canceled, it will stop subtracting time from your account.
Keeping your finished or stopped jobs in the jobs list is free. You won’t be charged for that. Currently, we don’t have a deletion time for the jobs, but it could eventually be added to our discretion.
The Cloud time bought may have an expiration date (usually, a year after the last time you bought some Cloud time).
At our webshop, you can buy as many Cloud hours as needed and the expiration date will be updated.
Having trouble with a job?
| Note |
|---|
If you are having trouble with a particular job, please do not delete it (unless it’s unnecessarily consuming your cloud time) and use the button on the toolbar to “Show selected render IDs”. This button will give you all the information that our team needs to identify the job. Copy the details and send them to the support team along with your message (you can send your message to support from here). Please, remember not to delete the job from the list, otherwise, we won’t be able to check what happened to your job. |
Version History
Here you can see the updates done to the Maxwell version that is loaded on the cloud machines related to the cloud service: Maxwell Cloud - Version History