...
To make things quicker and easier for the users, we also offer some Material Assistants that simplify the options and make it quicker to create new materials without having to touch many options. These assistants also use the same Maxwell Material under the hood and can be converted to the “Advanced” mode, so they can also be used as a starting point to create more complicated materials. With the assistants, you can create non-refractive glasses (AGS), opaque materials (plastics, ceramics, wood, lacquered surfaces,…), metals, transparent materials, translucent ones, car paint (with flakes effect), use Substance Painter textures, Substance Designer files,…
...
Material Editor layout
...
The Preview scene selector
It shows a list of the different scenes available to display the material preview. Some scenes can be more convenient than others to preview different features of the materials. For example, the “floor” scene will be useful to check the shine of the surface of your material, the “leaf” scene will be useful to create materials with single sided sub-surface scattering as it is backlit, or the “attenuation” scene can be useful to check the attenuation effect of a transparent material.
...
You can add custom scenes to the list by creating your own MXS files and adding them to the “preview” folder in Maxwell Render installation folder. The scene should have a camera with 1x1 proportion and a material called “preview” which will be the one replaced with your material when it is rendered.
The layer tree
Here you can see and edit the main structure of your material. All the components are always hanging from the Global Properties component. Under it, you can have a Material Assistant if you have created one of those or the different components of the Custom Material: the Displacement component (only one in the material), Layers, that can contain the rest of the components, BSDFs (which is the main component of the material), Emitters, and Coatings. You can learn more about the different components on this page: Layer Tree
...
You can drag and drop the different components to move them up or down in the stack, disable them using the dot icon (that turns into an X) and you can change the layers blending mode from Normal (N) to Additive (A). You can learn more about stacking layers here: Stacking Layers
Selection Properties
This area will show the different parameters of what’s selected on the Layer Tree.
...
The Override Map option is not available here as the plugin is handling it a bit differently than the Maxwell editor. You can use it directly from the Texture edition panel. Once you activate it, the projection parameters of the texture will be marked in blue and you’ll be editing the override parameters. Every texture that has the Override Map option active will be using the same parameters.
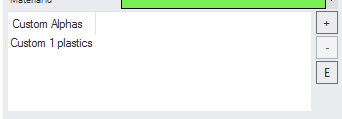
Additionally, in Rhino, it shows a box showing the custom alpha channels related to the material, letting you remove, add and edit them:
Layer. It lets you change the layer opacity, its mask and its blending mode.
Texture options
In the different components you’ll find this icon:
...
Also, its right-click menu will let you remove the texture and copy/paste it.
...
Text Notes
This box lets you add your own custom text notes to the material.
...