Facts
The denoiser included in Maxwell is based on Innobright's Altus technology.
Maxwell developers team, in collaboration with the Innobright team, has integrated Altus Denoiser inside Studio, Maxwell Render and plugins so you can enjoy the power of Altus and Maxwell together.
Denoiser integration is offered as a free solution for all Maxwell customers. No extra license is required.
The denoiser calculation is a biased process applied over unbiased Maxwell renders. The higher the sampling level of the render, the more accurate the denoiser solution will be and the less bias it will introduce.
User Interface
You can launch a render with Denoiser either from Maxwell Studio, Maxwell Render or any plugin. You will find very similar options on all platforms.
In Studio you can find Denoiser options under Render Options > Scene tab > Denoiser section.
In Maxwell, it is in Render Options panel > Denoiser, right below Scene section.
In plugins, its location may change from one to the other but it should be close to main render options.
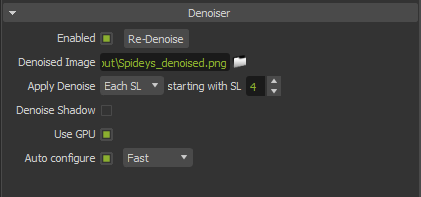
Denoiser options section
Regardless of where you use the denoiser, you will find the same options:
Enabled | Activates or deactivates denoiser calculation for the next render. |
Denoised Image | Here you can specify the path, name and format of the denoised image. |
Apply Denoise | In this drop-down menu you can choose to calculate the denoised image at each SL starting with the one set in the spinbox (default option) or only at the end of the render. |
Denoise Shadow | This option allows to additionally denoise shadow channel (only available with "Auto configure" set to "Accurate") |
Use GPU | If on, the denoised image will be calculated using the GPU (much faster usually), if not it will use CPU |
Auto Configure | If activated, this option will set all the required channels and options automatically; it comes in two flavours: Fast and Accurate (explained below). |
Re-Denoise (only in Maxwell Render) | This option allows to redo denoise calculation after you have made changes to Multilight sliders, so you can produce a denoised image with the new light configuration. |
Workflow
Two renders.
It's important to understand that the Denoiser needs to launch two renders and benefits from some extra channels so, when you activate the denoiser, render routine changes in order to get this information.
Don't worry, everything is done under the hood automatically and at the end, you will get the work of both renders combined in a merged mxi plus the denoised image.
You can get information the progress of both renders in Render Progress and Render Info toolbars and in Console:

Toolbar with two passes information
Apply Denoise - Each SL or At end.
There are two options to show denoised image:
Each SL
In this mode, Maxwell will calculate first pass (first render) until it gets to the SL set in the spinbox ("starting with SL") and then the second pass (second render) will kick in;
when both passes have reached SL4 (default setting) the first denoised image is calculated and shown in render viewport as if it was an extra channel (but with a square icon instead of a circle);

after that, the first pass is resumed until it reaches the next SL and then the second pass is also resumed; when both passes reach the same SL another denoised image is calculated and the process continues with this loop until it reaches the final SL or the process is stopped.
When the render is finished you will get the denoised image and both not-denoised passes will be merged into one file mxi and the image saved in the specified output format, so you get the result of all the work done.
All intermediate denoised images are calculated with a faster and lower quality method, but the final denoised image is always top quality.
This method allows to monitor if the render needs more time or not while you see the denoised result. It's the most interactive method.

Render routine scheme at "Each SL" mode.
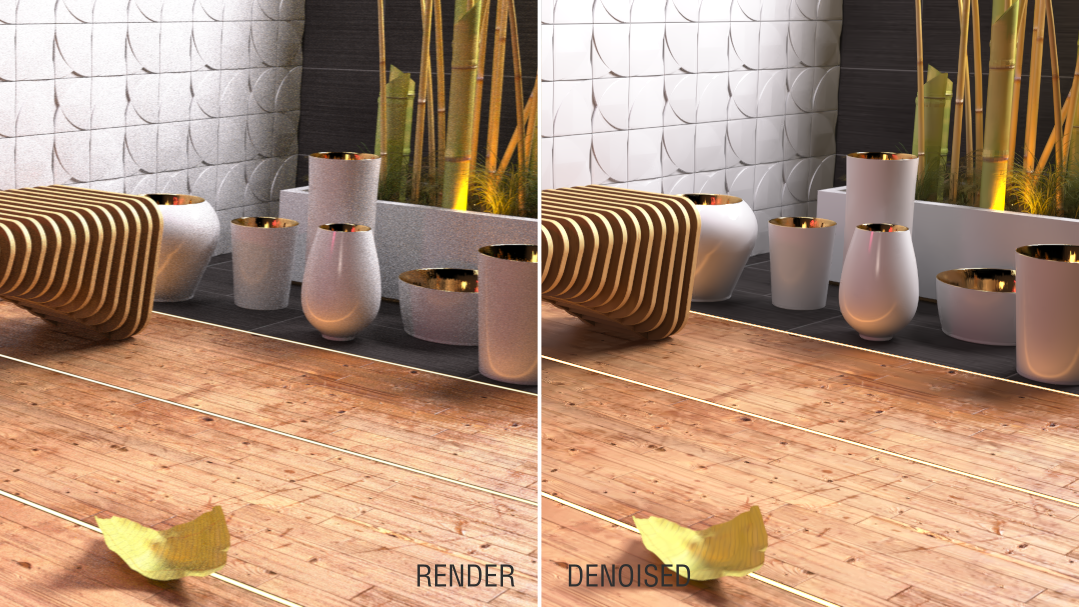
A sequence of a render at different SLs compared with its denoised version at the same SL when denoising at each SL.
At end
In this mode, Maxwell will calculate first pass until it reaches the final SL and then it will launch the second pass till final SL.
Then it will produce a denoised image and both not-denoised passes will be merged into one file mxi and the image saved in the specified output format.
You won't get a denoised image until the end of the process.
If you stop the render before starting rendering the second pass, you won't get a denoised image as the Denoiser won't have enough information to work with.
This method is less interactive and is only recommended if you already know which SL your scene will need to get a good result, for network renders, or animations.
| Note |
|---|
Please, note that if you stop the render before the second pass has started rendering, you won't get a denoised image as the Denoiser won't have enough information (the second pass) to work with. |

Render routine scheme at "At end" mode.
| Info |
|---|
The two passes are stored in a temporal folder; their names are based on the output name of the mxi following this pattern: mxiname_render1.mxi and mxiname_render2.mxi. The folder depends on the operating system but is printed in Maxwell Render Console during the render process after a blue DEBUG message like this: DEBUG: - Modifying Scene for Denoise values (MXI file: C:/Users/<username>/AppData/Local/Temp/maxwellrendertmp/test folders_render2.mxi) In Windows they are stored under: C:/Users/<username>/AppData/Local/Temp/maxwellrendertmp/ In MacOS they are stored in a random folder under /var/folders/ |
GPU or CPU
Regardless of the render engine you use, the Denoiser is capable of running on GPU, with Nvidia, AMD and Intel hardware; it works with CUDA (Nvidia) and also can work using OpenCL either in GPU (Nvidia, AMD or Intel) or CPU.
The default option is GPU as it is usually much faster; the Denoiser will first try to use CUDA, if it doesn't find a compatible card, it will fallback to OpenCL GPU (usually with AMD and Intel cards) and then OpenCL with CPU.
This would be minimum system requirements for Denoiser:
When using GPU, we recommend having a graphics card with at least 2.5GB. This number is actually dependent on frame size, 2.5GB is for 2k square imagery. Usually to calculate the denoised image you need a bit more than double the amount of memory used for rendering.
When using Nvidia CUDA, the drivers should support at least CUDA 7.0
When using AMD, the Catalyst driver should be up to date.
| Note |
|---|
In the case you get an error message when using CPU about OpenCL ICDs, it means Maxwell cannot find valid OpenCL drivers installed on your machine; usually, those drivers are included with your graphics card drivers, so I would try updating the drivers to the latest. If that doesn't help, it will probably be solved by installing this Intel's OpenCL runtime package: Windows: opencl_runtime_18.1_x64_setup.msi Linux: opencl_runtime_18.1.0.013.tgz This could also solve the error "OpenCL exception" shown when using the latest AMD processors. |
Auto configure
The Denoiser can make good use of extra channels in order to preserve features and details of the image, but it has some special requirements for the channels. Auto configure option sets everything up for you.
Both options, Fast and Accurate, calculate de denoised image with the same quality but activate different options under the hood that may affect render time and the final result in different ways.
Let's see the differences between Fast (default) and Accurate:
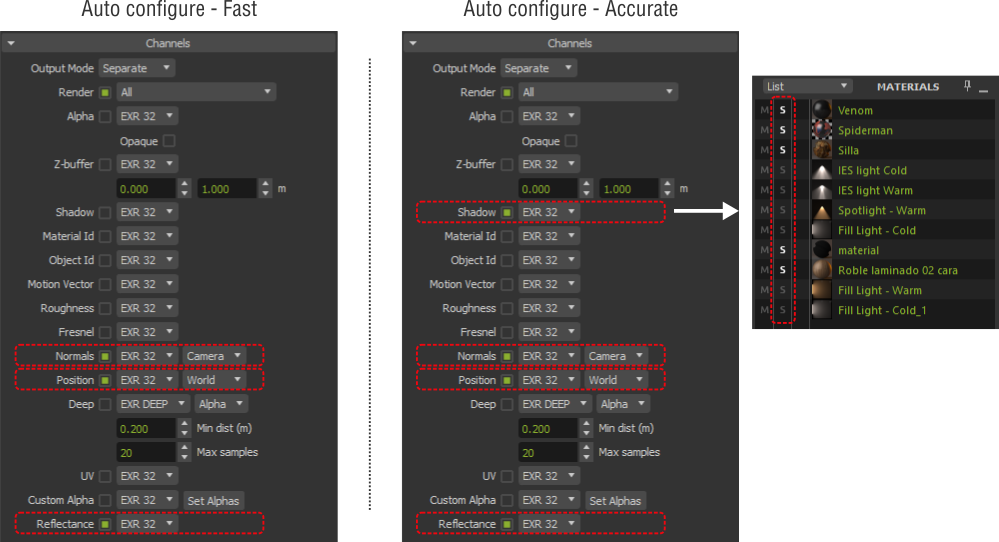
When you activate Auto configure, you won't see these channels actually active in the interface, but they will be activated internally at render time.
The main difference between Fast and Accurate is that Fast doesn’t use shadow channel making it almost twice faster than accurate, but as it relies on fewer channels, it could be less accurate.
On the other hand, Accurate method marks Shadow option in all materials except for emitters, so they show in shadow channel and activates this channel. The render will be slower but will count on shadow channel information which can make the denoiser process more accurate.
If you don't want to use any of the two Auto configure options and set everything up manually, you have to take into account that the Denoiser needs the following to work correctly:
all channels in EXR 32 format;
if you use Normals channel it should be in Camera mode;
If you use Position channel it should be in World mode;
if you want to use the Shadow channel, it is recommended to turn on Shadow option in all materials except for emitters.
Re-Denoise
This option is only available in Maxwell Render. It was added to the interface in order to apply Multilight changes to the denoised image after the render has finished.
Normally you will be able to change Multilight sliders and they will affect the not-denoised image as always; if you want to get a denoised version of it, you only have to click this button and Maxwell will apply the changes to both passes and redo the denoiser process with the new light configuration.
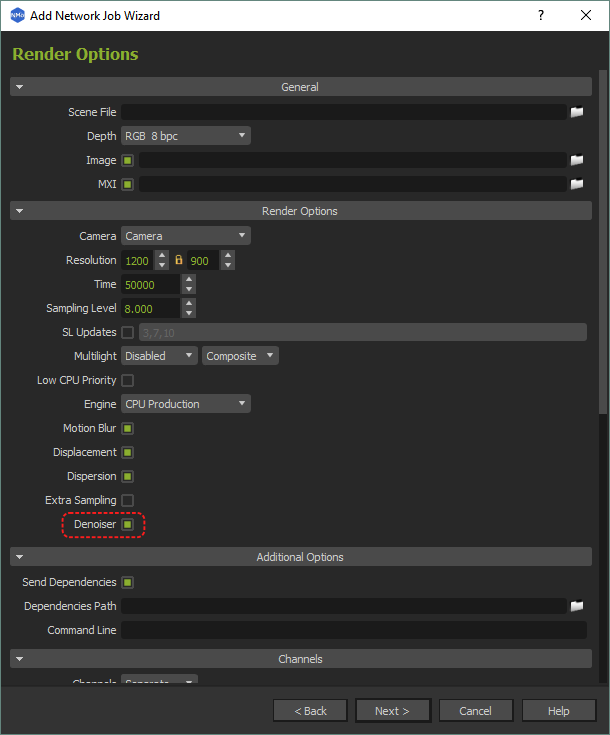
Denoiser and Network Render
The Network System can handle renders with Denoiser.
You will find a new checkbox in the Add Network Job Wizard to turn it on or off.
| Info |
|---|
Regardless of what was set in the scene, when launching a network job with Denoiser, it will always run in "At end" mode. |
Cooperative or single
Single mode: If the render is computed in single mode so each node runs a different frame (regardless it is an animation or batch render), the denoised image will be computed by the nodes, the same way as when it is rendered in Maxwell Render; this means each node will run the two passes and compute the denoised image.
Cooperative mode: in this case, as there are at least two nodes rendering the same frame, there is no need for the nodes to run the two passes, so the nodes will run normal renders (with the required extra channels and settings) and at the end, the manager will collect all the mxi files, merge them until there are only two left, and compute the denoised image from those two mxi files. So in this case, the computer running manager is the one that is going to calculate the denoised image.
Re-denoise manually through the Command Line (Windows) or Terminal (MacOS).
For the moment, once Maxwell is closed after rendering an image with Denoiser, the two passes cannot be loaded again into the interface to resume them or make changes and Re-Denoise, nevertheless, if you have at least a couple of mxi files of the same frame (and with the required channels), you can make Maxwell denoise them by running the following commands through the command line (on Windows using cmd.exe) or the Terminal (on Mac), not in Maxwell Render.
Collect the two mxi files
First, we need to collect the two mxi files generated by Maxwell when launching a render for denoising.
They are two mxi files which name is formed with the name of the scene you are rendering plus _tmp_render_1.mxi and _tmp_render_2.mxi. For example, if my scene is called Manual_Denoiser_demo, they will look like this:
Manual_Denoiser_demo_tmp_render_1.mxi
Manual_Denoiser_demo_tmp_render_2.mxi
They will be found in your user's temporal folder, inside a folder called maxwellrendertmp, mxnetwork\rendernode_<computername> or mxnetwork\manager_<computername> depending on the type of render you have launched.
This will be the path of the jobs where you should be able to find the two mxi passes depending on the type of job:
In the case of a single job or a local render:
It generates both passes and stores them in this path in the node:
Windows: C:\Users\<username>\AppData\Local\Temp\maxwellrendertmp
MacOS: /var/folders/qg/0wb0qn1968q28pr8s_cfwwk40000gn/T/maxwellrendertmp/
In the case of a cooperative job:
It works much like a normal network render: each of the nodes generates a single mxi file which is stored in its Temp folder:
Windows: C:\Users\<username>\AppData\Local\Temp\mxnetwork\rendernode_<computername>
MacOS: /var/folders/qg/0wb0qn1968q28pr8s_cfwwk40000gn/T/mxnetwork/rendernode_<computername>
and when the render is finished, they are sent to the Temp folder of the manager:
Windows: C.\Users\<username>\AppData\Local\Temp\mxnetwork\manager_<computername>
MacOS: /var/folders/qg/0wb0qn1968q28pr8s_cfwwk40000gn/T/mxnetwork/manager_<computername>
and then merged and denoised.
| Info |
|---|
How to find the Temp folder:
|
Once you have found the two mxi files, it might be a good idea to copy them to a more accessible folder. In the example, on Windows we decided to copy them in C:\Denoiser\ and on Mac in ~/Denoiser/ (inside Home folder).
Using the mximerge app to re-denoise the mxi files.
If we want to re-denoise an image after closing Maxwell, the basic idea behind it is running mximerge.exe (Windows) or mximerge.app (MacOS) application which can be found in the Maxwell Render installation folder. The problem is that we cannot run that program just by double-clicking on its icon as we have to add some arguments to make it do what we want.
ON WINDOWS
We have to open a Windows console in that folder; to do so, tap Windows key, type "cmd" and hit enter. You will get something like this:
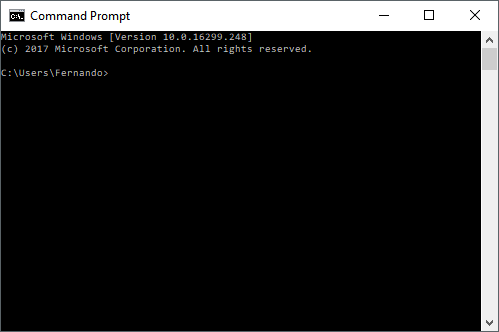
but instead of Fernando, it will say your user name.
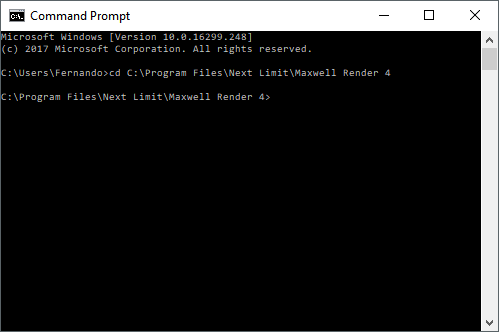
Then type the following: cd "C:\Program Files\Next Limit\Maxwell Render 5" and hit enter. That will make it Change Directory to Maxwell installation folder where mximerge.exe exists. You'll get this:
Then we'll have to execute the program with some extra arguments. If you only type mximerge -h and hit enter you will get some instructions of use and some examples, but basically what we have to type is this:
| Info |
|---|
mximerge -folder:"folder containing the mxi files of the same frame" -coopdenoiser:"output path and name of the denoised image" -target:"path and name of the merged mxi file" |
You have to make sure you use the same spaces, colons and quotation marks but obviously replacing the sentences between quotations with the actual paths (also with quotation marks), so it will look like this:
mximerge -folder:"C:\Denoiser" -coopdenoiser:"C:\Denoiser\output\denoised_image.png" -target:"C:\Denoiser\output\merged_file.mxi"
Then you just have to hit enter and the application will run. It will merge all the mxi files included in the first folder after "-folder:", it will calculate the denoised image and store it in the path and with the name specified after "-coopdenoiser:" and will also save the merged mxi file in the path and with the name specified after "-target:"
In order to help you write the lengthy command, you can copy the paths from the Windows file explorer and paste them in the command line.
ON MACOS
We have to open a Terminal; to do so, tap Command + space and type Terminal. You will get something like this:
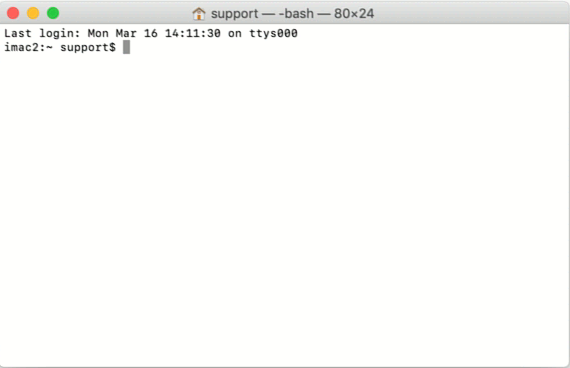
but it will show your computer and user name instead.
Then type the following: cd "/Applications/Maxwell Render 5" and hit enter. That will take you to the Maxwell application folder where mximerge.app exists. You'll get this:

Then we'll have to run the mximerge.app with some arguments. If you type this: mximerge.app/Contents/MacOS/mximerge -h you will get a list of possible commands, but to make it short, this is what we have to type:
| Info |
|---|
mximerge.app/Contents/MacOS/mximerge --folder:"folder containing the mxi files of the same frame" --coopdenoiser:"output path and name of the denoised image" --target:"path and name of the merged mxi file" |
You have to make sure you use the same spaces, colons and quotation marks but obviously replacing the sentences between quotations with the actual paths (also with quotation marks), so it will look like this in our case (make sure to create the output folder):
mximerge.app/Contents/MacOS/mximerge --folder:"/Users/support/Denoiser/" --coopdenoiser:"/Users/support/Denoiser/output/denoised_image.png" --target:"/Users/support/Denoiser/output/merged_file.mxi"
Then you just have to hit enter and the application will run. It will merge all the mxi files included in the first folder after "-folder:", it will calculate the denoised image and store it in the path and with the name specified after "-coopdenoiser:" and will also save the merged mxi file in the path and with the name specified after "-target:"
In order to help you write the lengthy command, the Tab key will auto-complete the folders as you write or you can drag and drop the folders to the Terminal.
Particularities and known issues
When the Denoiser is used, the Time limit won’t work normally and may not stop the render as you might expect; when using the At End mode, it will use the time limit for each pass, so it will take twice the time; when using Each SL, the time limit will be ignored.
When using GPU render engine (not for denoising, but for rendering), the denoised image will always be calculated at the end of the process only; "Each SL" method won't be available. Also, as Shadow and Reflectance channels are not available when using GPU engine for the moment, as a consequence of this, Auto configure will always be set to "Fast" when using GPU render engine.
When using Extra Sampling feature, only "At end" method will be available, as "Each SL" method makes mistakes when combined with extra sampling routine.
When using Multilight with Denoiser, if you make changes to the sliders while rendering, you won't see the expected result in the denoised image until both passes have been updated with the same light configuration. You will probably have to make the same changes in both passes.
The Denoiser does not work with CPU Draft engine; if you notice an unexpected error and the render is not launched with extra channels when using the Denoiser, most probably you are using CPU Draft engine. Please use CPU Production or GPU engines to solve the problem.
In some particular situations, Maxwell produces a wrong Shadow channel with big black dots; in these cases, it's better not to use it to calculate the denoised image or it will introduce artefacts in the final image. In this case, it is recommended not to use Auto configure in "Accurate" method and avoid using Shadow channel at all.
If the image is very small and the render very fast, it may occur that the Denoiser does not have enough time to compute the denoised image and its routine may eventually fail. In these cases, please, set it to apply Denoiser "At end" or increase "starting with SL" value.
When launching a network render with Denoiser, previews are not working.
When launching a network render in single mode with Denoiser, if the job is stopped before it has started the second pass, the job will become irresponsive (internally, it will try to start the second pass instead of stopping, and the interface will fall into an unknown state).
In some cases, usually when rendering big images, you may get this error: "Error running denoise process: OpenCL exception". Most probably this is caused by your graphics card running out of memory. In this case, it is recommended to change to CPU (where it is very common to have a bigger amount of memory available). When using the CPU you may run into another error about missing OpenCL ICDs; please check CPU or GPU section above to find a solution for that.
We will try to solve these issues or remove these limitations as soon as possible. Please, be patient.