...
Most 3D applications have a few standard UV mapping sets which can be enough for most objects. Maxwell Studio has the following standard UV sets:
Cubic: suitable for cubic shapes such as walls, buildings, tables.
Planar: suitable for flat planes or for mapping logos flat on part of a surface.
Spherical: suitable for rounded shapes.
Cylindrical: suitable for cylindrical shapes such as a vase, tires.
Studio has two more mapping types: Locked and Custom. The Locked type is for objects that are imported into Maxwell Studio and which already have their own UV mapping coordinates. Locked UV sets can't be edited. The Custom UV set is used for hair objects in MXS files opened in Studio.
...
This term refers to arranging the polygons and vertices of a 3D object in 2D UV space in such a way that each polygon occupies its own space and the texture can be applied to an object without distortions, even to objects where one general UV set (such as cubic, cylindrical...) would not be enough to avoid distortions. This is the best way to UV map your objects but this functionality doesn't exist in all applications, especially in CAD/architectural ones. You will find it most 3D content creation applications such as Maya, Softimage, C4D, 3dsMax. There are also standalone specialized UV unwrapping applications which will automatically unwrap an objects UVs. The typical steps in this case, if you are modelling in a CAD application, would be:
export your NURBS geometry as polygonal geometry (OBJ, or any other format that tesselates the NURBS surface into polygons)
import your tesselated object into the UV unwrapping application
select edges in your object that represent where you want the UVs to be "cut up" into smaller polygon islands to avoid distortions.
once you have your edges selected the application will take care to perfectly unwrap the UVs
save this object as an OBJ and import it into Maxwell Studio or your 3D content creation application
Creating and editing UV sets in Maxwell Studio
When you import an MXS file into Studio, most likely the objects already have at least 1 UV set attached to them. You can also choose to have Studio add a cubic UV set to any objects that don't have a UV set, from File>Preferences>Import options:
MXS import options: Create one UV channel per each object loaded
Obj import options: Create one UV channel per each object loaded
Creating a UV set
Select one or more objects and in the Attributes Panel: Object go to the UV sets section and click the New button. A new UV set will be added to the list (it will be added to all the objects in your selection). By default when you add a new UV set it is of the Cubic type. An object can have as many UV sets as you want, but normally 1 or two is enough.
...
Other tools for working with UV sets
Operator: This option allows you to apply the same transformation to all the selected UV’s at the same time, for example if you wish to scale all the selected UV sets by 10%.
Normalize: This function will force the UV set to have a size of 1m, regardless of the size of the object it is applied to. It is similar to checking the “Real Scale” box in the Material Editor Texture Picker, and it is useful to normalize the projectors directly, for example if you already applied a material to the object and you do not want to check Real Scale in the material. Please see further down the page about working with Real Scale textures.
Adjust to Object: Adjust the position, rotation and scale of the current UV set to the global position, rotation and scale of the object it is attached to.
Rename: Rename the current UV set.
Remove: Remove the current UV set.
UV sets and Channels
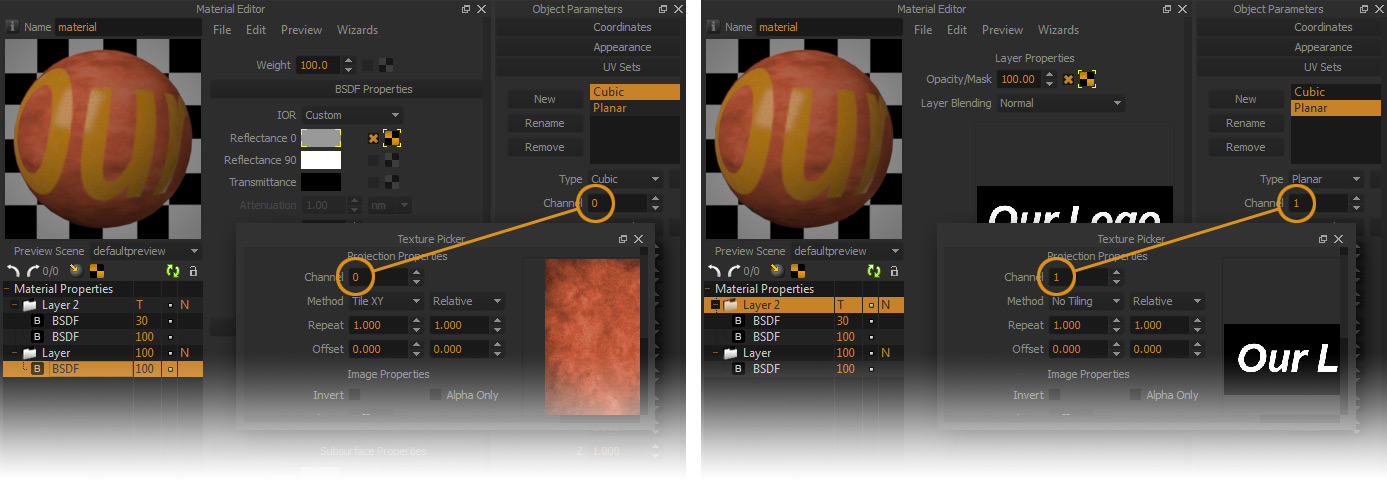
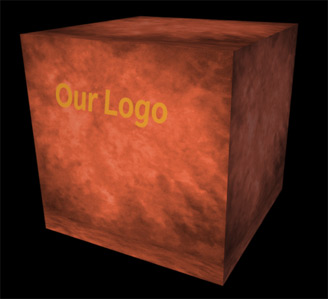
As mentioned before, when creating a UV set, it is always associated with a unique Channel number. This Channel number is used in the Texture picker to specify which UV set that particular texture is going to use. This can be useful for example if you want to apply an overall texture to the object using a cubic UV set, but want to apply on top of that texture a logo that needs to only show in a particular part of the object, using a Planar UV set. This example is shown below. You can also download the scene file here.
...
Mapping two textures using two different UV sets: Cubic and planar. Click image to enlarge.
...
The resulting render
Working with "Real Scale" textures
...
There are cases however when working with textures when you need to set the UV set to a real size, no matter the size of the object the texture is applied to. For example if you have a texture of a floor tile which you know in the real world represents 50cm. You want to apply this tile material to an object of any size and be sure that each tile you see on this object should represent 50cm when applied to it. In this case the UV set must be set to a real size and you have two options to do this:
Through the tiling method in the texture picker. Switch it from Relative to Meters. When you do this, the number in the Repeat parameter no longer represents the number of times the texture should be tiled on the object, but what size this texture represents in the real world, in meters. If you set the tiling parameter now to 0.5 for example it means this texture should be 50cm in size on the object. When you apply this material to an object you will get a pop-up saying that materials using absolute scale need to have it's UV sets normalized. Click Yes, or Yes to all to normalize all the UV sets the object has. Studio will "normalize" the UV set(s) of the object meaning it will scale them to a real scale of 1 meter.
By selecting a UV set from the UV set list and clicking the Normalize button in the UV sets section of the Object parameters panel. This will scale the selected UV set(s) to a real scale of 1 meter. You can now set the texture tiling in any textures used in the material applied to the object to Meters and they will tile correctly.
| Tip |
|---|
If the texture in the viewport doesn't update to show the new real scale values, try clicking first in the viewport to force it to update, or reapply the real scale material to the object. |
...

