Downloading the installer
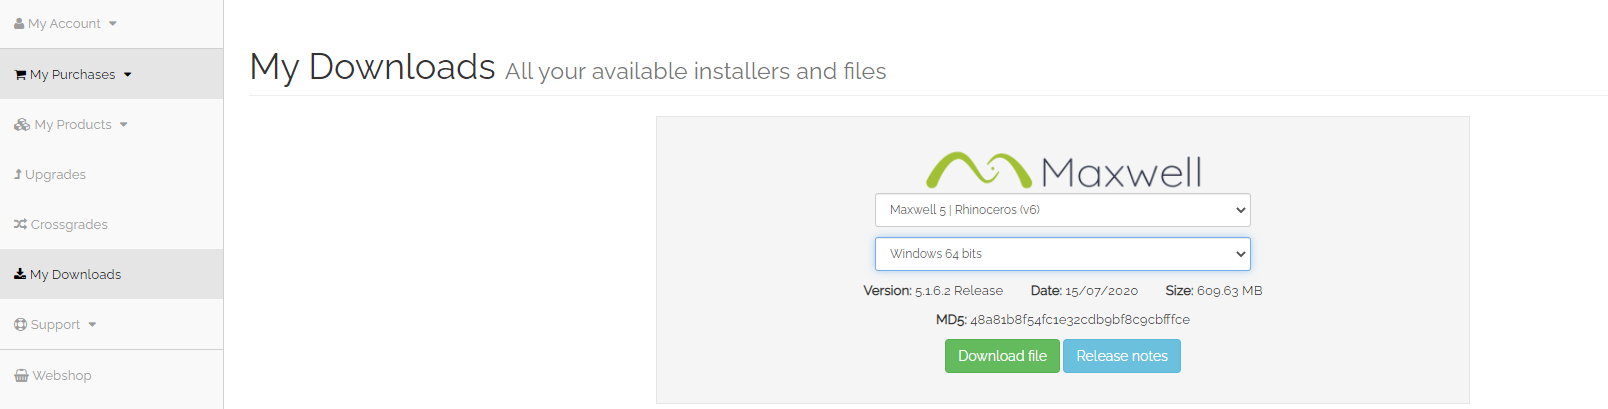
Each Maxwell product has its own installer. You can download all the products you’ve acquired from your account at the portal (https://portal.nextlimit.com/) from the “My Downloads” section. Maxwell 5 products can be found in the section labeled with Maxwell 5 logo and Maxwell title:
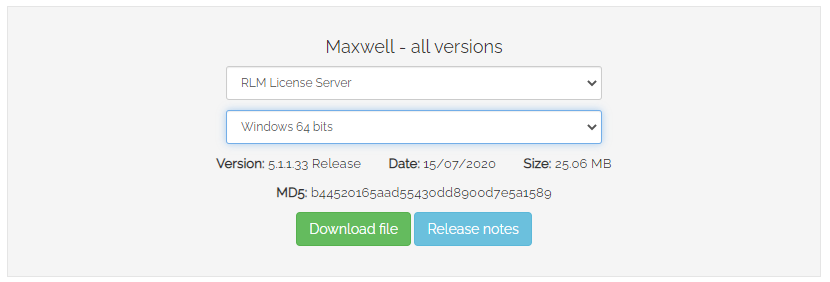
You’ll also find Maxwell 4, Maxwell 3 sections if you own any of them and some common products that are available for all our customers in a section below called “Maxwell - all versions”. It includes Maxwell Multilight Standalone application, an RLM standalone installer (including the License Activator) and a Maxwell material collection from Arroway:
Installation
Once you have downloaded the installer for your product you have to install it.
The name of the installer usually describes the product, version and operating system in this fashion:
maxwell_studio_5.1.1.33.release_win64.exe - Installer for Studio, version 5.1.1.33 for Windows.
maxwell_rhino_v5.1.6.2_OSX.pkg - Installer for Maxwell for Rhino, version 5.1.6.2 for MacOS.
The first two figures of the product version always match the first two of Maxwell Render, but the rest may differ from one product to another.
In general, the installers for the different products include other installers inside; a bit like in this scheme:
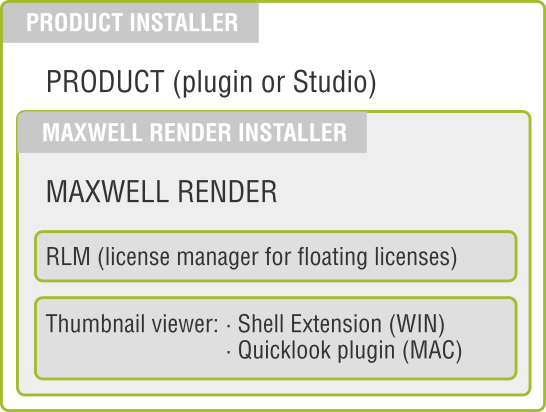
Nested installers scheme
The main installer will install your plugin (the part that installs into your 3d app) or Studio.
It will launch the Maxwell Render installer; this is the render engine itself, which is common for all the plugins and Studio; it’s the core of Maxwell where the renders are processed.
The Maxwell Render installer includes the RLM installer (it’s only required if you are using floating licenses on the computer where all the licenses are hosted, not in any other computer or license type).
It also includes a thumbnails viewer extension for your computer’s file browser (called Maxwell Shell Extension on Windows or Quicklook plugin on MacOS), so you can see a preview of Maxwell files: MXS (Maxwell scene file), MXI (Maxwell image file) and MXM (Maxwell material file).
Just double click your installer file and it will start. The different product installers may differ a bit, but in general terms, you will be able to choose if you want to install the plugin, Maxwell Render or both things. If you already have the exact same version of Maxwell Render, there’s no need to install it again, but if not, it’s mandatory for the plugin to work.
| Info |
|---|
WORK IN PROGRESS |
For Maxwell Render, we are using RLM License Server system (Reprise License Manager). The RLM licensing system works by installing a small application called the RLM License Server (on the computer of your choice), and this server will "serve" licenses to any computer in your network that connects to it, including the computer that's running the licensing server. If you have a Node Locked license, you do NOT need to install the RLM License Server.
| Warning |
|---|
It is only necessary to install ONE instance of RLM in your entire network and NOT on each of the computers that will run Maxwell. Installing several instances of the RLM License Server on your network will result in conflicts and possibly licensing errors. |
How the license activator works
For all Maxwell Render purchases you will receive a license activation key (via email). This key is not the actual license serial number - this is generated and written onto your hard drive via the license activation process. This license activator (which will pop-up automatically whenever Maxwell Render does not detect a license) can be found in the Maxwell Render.exe menu: Help>Activate license.
The activation process is done online by connecting to our server which verifies the license key and password information that you provide. It then writes the license file onto your hard disk (or the hard disk of the computer where your license server is running). See below for the folder paths.
There is also an option to activate your license offline if you have no internet access, or if you want to activate a license on a computer other than the one you are using. For this option you will be required to enter the Host ID of the computer - to find this ID you can check in the SYSTEM INFO readout of the Maxwell Render console panel. Open Maxwell.exe and if the Console panel is not visible, go to Window in the top menu and make sure "Console" is checked. You may need to scroll up in the panel until you see the Host ID.
...
For Floating licenses
| Expand |
|---|
If you have a Floating license your main license file is named "maxwell_suite_floating.lic" , and will be placed in: Windows C:\ProgramData\Next Limit\Maxwell\licenses\v5 OSX /Users/Shared/NextLimit/rlm_nl/licenses Linux $(HOME)/Maxwell/v5 (in the Maxwell folder inside the user home folder) |
For Node Locked licenses
| Expand |
|---|
Your license file is named "maxwell_license.lic" and will be placed in: Windows C:\ProgramData\Next Limit\Maxwell\licenses\v5 OSX /Users/<username>/Maxwell/v5 Linux $(HOME)/Maxwell/v5 (in the Maxwell folder inside the user home folder) |
A second type of license file will be present on each of the computers (including the one running the server). This license file is named "maxwell_license.lic" and will actually only contain a single line of text. This line tells Maxwell on which computer in your network is running the license server, and on which port it should connect to, in order to be issued a license. This line will be similar to this:
...
HOST mylicensecomputer ANY 5053
The "host" in this case is the computer name where the RLM license server is running. Maxwell will try to connect to it using the default connection port of 5053 (note that this is different than the 5054 port mentioned below). In Windows and Linux this file will be placed in the same location as mentioned above. In OS X it will be located in /Users/<username>/Maxwell.
| Info |
|---|
If you are using Windows it may happen that you can't find the folder mentioned above. It is because that folder is hidden by default. If you want to make it visible, you have to activate "Hidden items" option in the File Explorer > View tab:
|

Custom location for the license files
It it possible to change the location of this file by setting an environment variable named nextlimit_LICENSE=port@host. For example, if you want a rendernode to point to a license manager that has the IP 192.168.0.19 using the port 5053 you have to set an environment variable which looks like this: nextlimit_LICENSE=5053@192.168.0.13
Virtual Machines
The RLM license server can work in virtual environments, i.e VMWARE, Amazon cloud, Parallels or other virtual environments, but the licenses have to be enabled for that in Customer Portal when generating the license. You will find that checkbox in second step of the license generation process like shown the image below:
...
Here’s how the Windows and MacOS Maxwell Render installers look like:
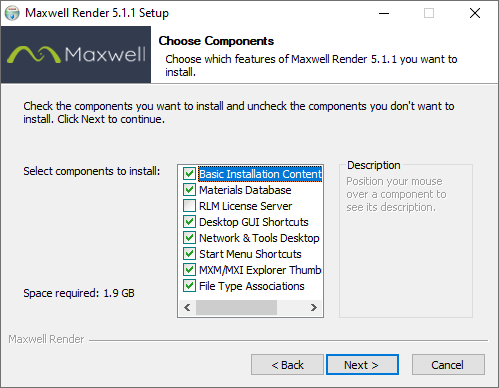
Maxwell Render installer for Windows
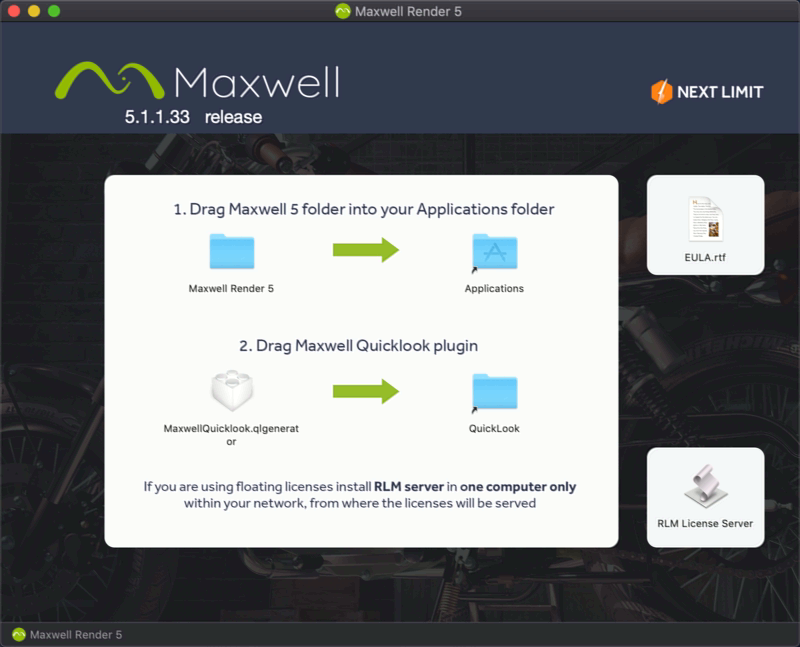
Maxwell Render installer for MacOS
In this step of both installers, you can choose to install or not the RLM and the thumbnail viewer.
On Windows:
Check RLM License Server only if you are using floating licenses and you want to install the license server on that computer.
The thumbnail viewer is called MXM/MXI Explorer Thumbnails, uncheck it if you don’t want it to be installed.
Then click Next to install everything. The different installers will be launched in sequence.
On MacOS:
Drag Maxwell Render 5 to the Applications folder.
Double-click on the RLM License Server icon if you wish to install it on that computer.
Drag MaxwellQuicklook.qlgenerator to the QuickLook folder if you want it to be installed.
License Activation
The next step is to activate the license so you can work normally.
Please, refer to these pages depending on your license type:
You can also try a Manual license activation by following this guide: Manual license activation
Installing Maxwell in silent mode
Maxwell allows a silent installation of its components via command line on Windows. To do so, simply type /S when invoking the installer on the command line prompt:
maxwell_render_4.1.1.1_win64.exe /S /D=C:\Program Files\Next Limit\Maxwell
The additional arguments are:
/D=dir (to indicate the folder where Maxwell will be installed)
/MATERIALDATABASE= dir (to indicate the path to the materials database folder)
/SHORTCUTS=on/off (creates desktop shortcuts to the application. By default it is disabled)