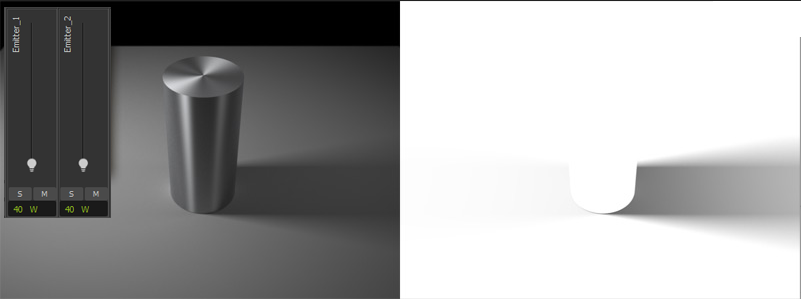
This channel is a grayscale image that represents the shadows received by objects that have a material applied to them with the “Shadow” option turned on. This is useful to composite the shadows cast by a rendered object into a photograph. The “Shadow” option must be enabled for the desired shadow-catching material. This option is enabled from the Material properties of the material:
...
Images from top left to bottom right represent: HDR map used, Backplate photo, scene layout showing the car and the ground objects, Alpha channel, Shadow channel (full shadow) and Main render.
Render channels. Click the image to enlarge it
Final composite. Scene, model and HDRI plates courtesy of Nikos Nikolopulos
Knocked out shadow pass vs Full shadow pass
By default when you choose to render a shadow pass, any visible objects in the render will become fully white in the shadow channel, thus obscuring parts of the shadow channel. This is done in order to be able to render both the main render and a shadow channel at the same time. It can however cause problems when compositing this knocked out kind of shadow pass with objects that have been cut out from the background using an alpha channel. You may see a few faint white pixels along the borders of the object and the shadow pass, depending on the brightness of your background and the objects.
...
If we now change the intensity of the emitters using Multilight, to make the right emitter weaker for example, the composite shadow channel will update to show this difference also in the shadow channel.


