To open the plugin's integrated Maxwell Material Editor, either click the 'Material Editor' button in the Material's Attribute Manager interface, or click the 'Material Editor' item in the plugin's main menu. This will bring up the plugin's integrated Material Editor, which is very similar to Maxwell MXED (as noted in the MXM Linking section, a linked material does not show this interface; it shows the same interface as the Attribute Manager): 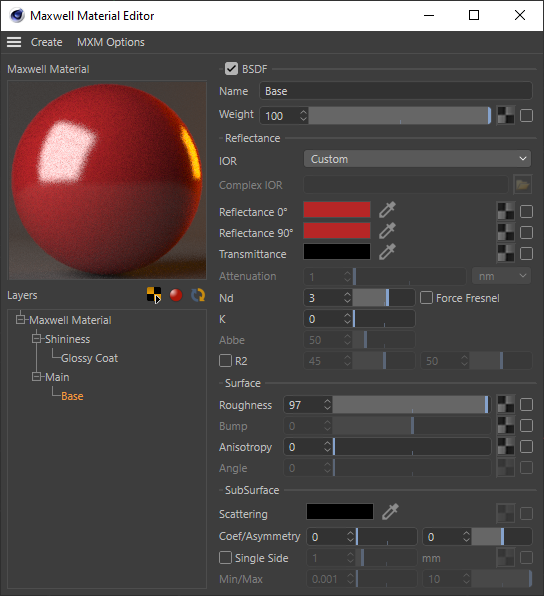
...
| Item | Description |
|---|---|
| Material Preview | Double-clicking the preview will start a preview-refresh (as with MXED). Dragging an MXM file from the Cinema Content Browser, MXED MXM Browser, or Explorer/Finder and dropping it here will cause it to be imported into the scene. |
| Active Texture | Sets which one of this Material's textures will be shown in the viewport (if it has any textures) using a drop-down menu. To show the basic color of the Material again, select (none) from the menu. |
| Real-time Preview | This sets whether the material editor will refresh the preview automatically whenever a material parameter is changed. It may be useful to disable it when rendering in Fire, to allow your CPU to work on the Fire image without getting slowed down by attempting to keep material previews updated in real time.Note that for technical reasons, in C4D versions prior to R12, this option is contained in the plugin's Preferences panel (page 51), rather than here as a button in the material editor. |
| Refresh Preview | This button simply requests that a new material preview be rendered. |
Material Layers Tree
Similar to the tree found in MXED, this control allows you to define the structure of the material. New components are added by right-clicking the desired parent component and choosing what to add (i.e. right-click a Layer to add a BSDF). Child components may be re-ordered under their parent by dragging them from their current position and dropping them on their parent node; this will put them at the top of the list.
Components may be copied by holding down CTRL while executing a drag-drop action; rather than moving the dragged component, a copy of it will be added to the target node.
Additionally, individual components may be dragged back and forth between the Layers tree and the various pages in the Database Manager; this makes it easy to build new materials from pre-defined components.
Material Page
The parameters in this page apply to the Material as a whole. Each Material saves its own Preview Options, so that different MXS preview scenes may be used for different types of Materials. The MXS preview scenes listed in the Scene drop-down are those found in the Maxwell/preview directory. In addition to specifying individual bump maps in each BSDF layer, it is also possible to supply a bump (or normal) map here which will be used to affect the material as a whole.
BSDF Page
The operation of this page is similar to that of the BSDF page in MXED. When certain parameters in the page are grayed-out, it means that they would have no effect; they will become enabled when other parameters have been changed in such a way as to make them effective.
When Reflectance > IOR is set to 'Measured Data', all of the parameters in the Reflectance group will be grayed out, since they have no effect in this case. Similarly, the min/max Thickness controls in the SubSurface group are only enabled when (a) Single Side SSS is enabled, and (b) an SSS Thickness map is assigned and enabled.
Layer Page
The operation of this page is similar to that of the Layer page in MXED.
...